
The Navy Squares Quilt Block Pattern is a striking geometric quilt design that combines squares, rectangles, diagonal units, and carefully arranged fabric strips to create a balanced block with a strong directional effect. Although the sample shown uses rich green prints paired with a light neutral background, the same construction works beautifully with navy blue, teal, burgundy, Christmas fabrics, batiks, or scraps from your existing fabric collection.
The secret is not a specific color but the contrast between the main fabric and the background. With accurate cutting and careful pressing, the individual pieces gradually form a sophisticated block that looks much more complicated than its basic components suggest.
One of the most appealing features of the Navy Squares Quilt Block Pattern is the way simple patchwork shapes interact. Large contrasting squares provide visual resting points, while narrower strips create pathways that appear to travel toward and away from the center. Diagonal seams at the upper and lower points add another layer of movement and give the finished block its distinctive diamond-like appearance when displayed on point. This makes the design suitable for traditional quilts as well as modern projects. Once you understand how the sections are assembled, you can repeat the block for a bed quilt, table runner, wall hanging, cushion cover, or seasonal patchwork project.
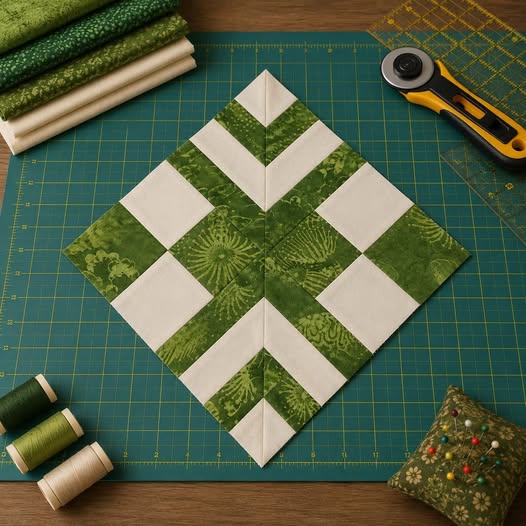
This tutorial explains a practical method for recreating the project inspired by the photograph. Because an exact original cutting chart cannot be confirmed from a finished photograph alone, the dimensions below are presented as a workable construction approach rather than an original designer’s pattern. The important techniques are accurate rotary cutting, quarter-inch seam allowances, strip piecing, diagonal units, nesting seams, and careful final trimming. Beginners can work slowly through each section, while experienced quilters can easily adapt the proportions to create their preferred finished size. Understanding these techniques also makes the Navy Squares Quilt Block Pattern easier to resize or customize.
Materials, Measurements, and Cutting for the Navy Squares Quilt Block Pattern
For one practice block, choose two fabrics with strong contrast. Use approximately one fat quarter of a dark or medium feature fabric and one fat quarter of a cream, white, or other light background fabric. The photograph demonstrates why contrast matters: the printed fabric defines the geometric pathways while the pale fabric creates clean negative spaces. You will also need coordinating cotton thread, a rotary cutter, an acrylic quilting ruler, cutting mat, sewing machine, iron, ironing surface, pins or clips, and a square ruler for checking the block during construction.
For an easy-to-manage version, begin with strips cut approximately 6.5 cm (2½ inches) wide. This width works especially well for learning the arrangement because it produces pieces large enough to sew comfortably while retaining the visual proportions associated with traditional patchwork. Cut several 6.5 cm strips from both the feature fabric and background fabric. From these strips, prepare squares and rectangles as needed for your individual sections. It is better to cut a few additional pieces than to discover halfway through construction that you are missing one matching unit.
The term Navy Squares Quilt Block Pattern can describe the arrangement even when another color is substituted for navy. If you want the title reflected literally in your finished project, select a navy print as your primary fabric. Navy with white creates a crisp nautical appearance, navy with cream feels more traditional, and several different navy prints can produce an attractive scrappy effect. Whatever combination you choose, place the fabrics beside each other before cutting to make sure there is enough value contrast for the geometry to remain visible.
For the square areas, cut matching 6.5 cm × 6.5 cm (2½ × 2½ inch) squares from both fabrics. For elongated portions, cut rectangles based on multiples of the same 6.5 cm module. For example, a two-unit rectangle can begin around 6.5 × 12.7 cm before seam adjustments and trimming. When adapting the measurements, remember that patchwork dimensions include seam allowances. Maintaining the same modular system throughout the project is more important than forcing every section into an arbitrary measurement.
The pointed areas at the top and bottom can be constructed using half-square triangle techniques or diagonal corner units. A beginner-friendly approach is to place a light square and feature square right sides together, mark a diagonal line, stitch beside that line, cut, press, and trim. These diagonal components should finish at the same modular size as the neighboring square units. Trim every half-square triangle before assembling the larger block. Small inaccuracies in these units can multiply quickly when several seams meet near the center.
Before sewing anything permanently, arrange all pieces on a flat surface to reproduce the overall geometry visible in the reference. Keep the central seam vertical, place corresponding units on opposite sides, and check that the light areas mirror each other. This temporary quilt block layout is extremely helpful because many pieces are similar in size but must face different directions. Taking a quick reference photo of your arrangement before moving to the sewing machine can also help you maintain the correct orientation.
Piecing the Main Geometric Sections Step by Step
Start with the smaller units near the pointed end of the Navy Squares Quilt Block Pattern. Join the feature and background pieces using a consistent ¼-inch (6 mm) seam allowance, which is the standard seam used for most American quilting projects. Sew at a moderate speed and avoid pulling the fabric behind the presser foot. A straight, consistent seam is far more valuable than sewing quickly. After each seam, check that the edges remain aligned and that the unit has not stretched out of shape.
Next, construct the strip-like sections that form the central chevron effect. Place one feature strip against one background strip with right sides together and stitch along the long edge. Press the seam carefully before adding the next piece. The photograph shows alternating light and patterned sections traveling diagonally toward the center, so orientation matters. Make one side first, return it to your layout, and then construct its mirrored partner instead of making both sections from memory.
Pressing seams is an essential part of this design. Rather than aggressively sliding the iron across the fabric, lower and lift it gently to avoid distorting the pieces. You can press seams toward the darker fabric where practical, but some intersections will benefit from seams pressed in opposite directions. This technique is called nesting seams. When two opposing seam allowances meet, they naturally lock against one another and help produce precise corners.
Build the wider side sections separately. Each side contains alternating feature and background areas that resemble portions of a checkerboard or stepped arrangement. Join the smaller pieces into rows first, checking their measurements after every stage. Then sew those rows together. When crossing an existing seam, slow down and make sure the seam intersections remain aligned. Pins placed immediately before and after an intersection can prevent the layers from shifting while they pass under the presser foot.
Now create the opposite half using the same process, but pay close attention to the mirrored orientation. This is one of the easiest places to make a mistake in a geometric patchwork quilt block. Before stitching the final seams, place both halves next to each other and verify that the feature-fabric pathways flow symmetrically toward the center. The light squares should also appear in corresponding positions. If something looks reversed, correcting it now is much easier than unpicking the completed block.
Once both main halves are complete, measure them before joining them. Their lengths should match closely, and corresponding seam intersections should line up. Place the halves right sides together, match the center and major intersections, and secure those points with pins or clips. Sew the long center seam carefully. Open the block and press it gently. At this stage, the recognizable Navy Squares Quilt Block Pattern should emerge, with the two sides creating a coordinated geometric composition.
Achieving Accurate Points, Corners, and a Flat Quilt Block
Precision makes a major difference in this pattern because the eye naturally notices repeating lines. Start by confirming the accuracy of your ¼-inch seam allowance. Sew a test seam on scrap fabric and measure it before beginning the final block. Even a difference of 1–2 mm can accumulate across multiple pieces. If your sewing machine has a quarter-inch presser foot or seam guide, this is an excellent project for using it.
When joining diagonal pieces, remember that fabric cut across the bias can stretch more easily than fabric cut along the straight grain. Handle these pieces gently and avoid pulling them while sewing or pressing. If a diagonal edge becomes stretched, the finished block may ripple instead of lying flat. Starching or lightly pressing the fabric before cutting can provide additional stability, especially when working with soft quilting cotton or batik fabric.
The center of the Navy Squares Quilt Block Pattern deserves particular attention. Several visual lines converge around this area, so even minor misalignment can become noticeable. Match the central points first and work outward. Instead of trying to correct an inaccurate intersection by stretching one layer, resew the short section if necessary. A few extra minutes spent correcting an important junction usually produces a much more professional result.
After assembling the major sections, place the block on your cutting mat without immediately trimming it. Use ruler markings to identify the true vertical and horizontal center. Check that opposite points are positioned evenly. If the outer edges are slightly uneven, determine whether the discrepancy comes from excess seam allowance or an incorrectly sized unit. Trimming should refine a correctly constructed block rather than disguise a major piecing error.
To square up a quilt block, align a square quilting ruler with the center lines and important diagonal seams. Trim only small amounts from each edge. Keep at least 6 mm beyond any points that need to survive the final seam when the block is joined to another block or border. Cutting directly against a point will cause it to disappear into the next seam. This small allowance is often described by quilters as leaving the point “floating.”
Finally, give the block a careful finishing press. Use enough heat for your chosen cotton fabric but avoid repeatedly pushing the iron over the seams. The finished piece should lie flat without puckers or stretched corners. A well-pressed block is easier to measure, join to neighboring blocks, photograph, and quilt. At this point, you have completed the fundamental construction and can begin thinking about how the Navy Squares Quilt Block Pattern will work in a larger project.
Finishing, Color Variations, FAQ, and Final Project Ideas
One completed block can become the center of a quilted pillow, mini quilt, tote bag panel, or wall hanging. Add a simple border around it if you want to emphasize the geometric shape. For a table runner, make three or four matching blocks and join them in a row. Because the pattern contains strong directional lines, rotating alternate blocks can produce completely different secondary designs without changing the actual piecing method.
For a larger quilt, make several blocks using identical fabrics for a controlled traditional appearance. Alternatively, keep the light background consistent and use different navy or dark-blue prints in each block. This approach creates a scrappy quilt pattern while maintaining visual unity. Batiks are particularly effective because their subtle variations add texture without obscuring the geometric structure. Solid fabrics create an even more modern appearance.
You can also explore seasonal versions. Green and cream resemble the sample and can create a woodland or holiday-inspired project. Red and white provide a bold classic contrast, while blue and white can feel crisp and timeless. Autumn prints paired with ivory produce a warmer result. The construction remains essentially unchanged, demonstrating how versatile the Navy Squares Quilt Block Pattern can be when the fabric palette changes.
When making multiple blocks, cut all similar pieces at the same time and organize them into labeled groups. This process, sometimes called chain piecing preparation, can dramatically improve efficiency. You can then feed repeated units through the sewing machine one after another without cutting the thread after every piece. Afterward, separate the units, press them in batches, and return them to their individual block layouts.
Before quilting the completed top, decide how much you want the quilting stitches to compete with the patchwork. Straight-line quilting that follows the geometric pathways can reinforce the block design. Diagonal lines can echo the pointed sections, while simple stitching in the ditch can keep attention primarily on the fabric arrangement. There is no requirement to use elaborate quilting; clean, evenly spaced lines often complement a geometric block particularly well.
The most important lesson is that successful geometric quilting comes from consistency rather than speed. Accurate cutting, a dependable seam allowance, thoughtful pressing, and repeated measurement all contribute to the final appearance. Even if your first Navy Squares Quilt Block Pattern contains a few imperfect intersections, completing the block teaches valuable techniques that transfer directly to countless other patchwork designs.
FAQ: Frequently Asked Questions About the Navy Squares Quilt Block Pattern
Is the Navy Squares Quilt Block Pattern suitable for beginners?
Yes. A confident beginner who can sew a straight seam can work through this project. The arrangement appears complex because many geometric lines interact, but the individual techniques involve familiar squares, rectangles, diagonal units, and straight seams. Beginners should concentrate on constructing one section at a time rather than looking at the entire design as one complicated block.
Do I have to use navy fabric for this quilt block?
No. The Navy Squares Quilt Block Pattern can be adapted to virtually any color palette. Navy and white provide excellent contrast, but green and cream, red and white, purple and gray, or even multicolored scraps can work beautifully. What matters most is maintaining enough contrast between the main pathway fabric and the background fabric.
What does a ¼-inch seam allowance mean in quilting?
A ¼-inch seam allowance means stitching approximately 6 mm from the raw edge of the fabric. It is the standard seam allowance used in many American patchwork patterns. Consistency is extremely important because every seam slightly changes the finished dimensions of a unit. An inaccurate seam allowance repeated several times can noticeably alter the finished block.
Why are my quilt block intersections not matching?
Mismatched intersections usually result from slightly inaccurate cutting, inconsistent seam allowances, stretched diagonal edges, or seams that were not aligned before sewing. Try pressing adjoining seams in opposite directions so they nest together. Pin the exact intersection before sewing and stitch slowly as you approach it.
How can I keep diagonal pieces from stretching?
Handle them as little as possible, avoid pulling the fabric through the sewing machine, and press with an up-and-down motion instead of sliding the iron. Because diagonal or bias edges have more flexibility, excessive handling can distort them. Preparing the fabric carefully before cutting also helps.
Can I make this block larger or smaller?
Yes. The easiest method is to treat the design as a collection of proportional modules. Increase or decrease the basic square size while preserving the same relationships between the squares, rectangles, and diagonal units. Remember to include seam allowances in every cutting measurement. Making a single test block before cutting an entire quilt is strongly recommended.
What fabric is best for this quilt block?
Good-quality quilting cotton is generally the easiest choice because it cuts accurately, presses well, and has enough stability for geometric piecing. Batiks can also work very well. Beginners may find extremely stretchy, slippery, or heavy fabrics more difficult because precise intersections become harder to control.
Should I press seams open or to one side?
Either technique can work. Pressing toward the darker fabric is common in traditional quilting, while pressing seams open can reduce bulk in complicated intersections. For this particular design, pressing selected seams in opposite directions is useful because it allows important intersections to nest. Choose the method that produces the flattest and most accurate section.
How many blocks would I need for a complete quilt?
That depends on the finished size of your individual blocks, the desired quilt dimensions, whether you use sashing, and the width of any borders. Make and accurately measure one finished test block first. You can then calculate how many blocks are needed across the width and length of your planned quilt.
Why should I make a test block first?
A test block allows you to verify the cutting dimensions, seam allowance, fabric contrast, pressing strategy, and finished size before committing a large amount of fabric. This is particularly valuable when recreating a design from visual inspiration because small adjustments may be necessary to achieve the proportions you prefer.
Can leftover fabric be used for this pattern?
Absolutely. This can become an effective scrap quilt block when several related prints are substituted for the main fabric. Try keeping the background consistent while varying the darker squares and strips. The consistent background helps connect the different prints and preserves the recognizable geometry.
What is the most important step for getting a professional-looking result?
Consistency throughout the entire process matters most. Accurate cutting cannot compensate for an inconsistent seam allowance, and perfect seams cannot fully compensate for incorrectly cut pieces. Cut carefully, sew steadily, press after each construction stage, and measure units before combining them into larger sections.
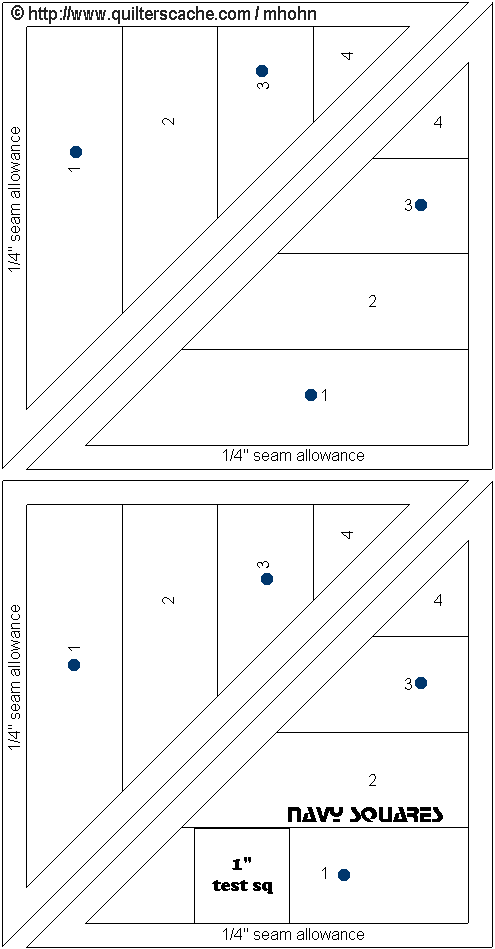
The Navy Squares Quilt Block Pattern transforms straightforward patchwork techniques into an eye-catching geometric design. In this tutorial, you learned how to select contrasting fabrics, work with a modular cutting system, create square and diagonal units, sew with a consistent ¼-inch seam allowance, construct mirrored sections, nest important intersections, press without distorting the fabric, and square the completed block. These fundamentals are useful far beyond this single project and can improve accuracy in many traditional and modern quilt patterns.
The greatest advantage of this block is its flexibility. You can reproduce the green-and-cream character of the pictured sample, interpret the Navy Squares Quilt Block Pattern literally with navy and white fabrics, or create an entirely different palette from your favorite scraps. Start with one test block, focus on precision rather than speed, and use what you learn to refine the next one. If you make this project, leave your sincere opinion about the pattern and share your suggestions for colors, layouts, or variations you would like to try next.