
The Crochet Easy Granny Square Pattern is a charming way to combine classic granny-square construction with a decorative floral center. Instead of creating a square made only from traditional clusters, this design builds outward in layers, beginning with a small flower and gradually transforming the round motif into a neat square.
The combination of a soft center, bright petals, and a contrasting outer color gives the finished piece plenty of dimension while keeping the basic construction approachable. Once you understand where the increases and corner spaces belong, the same method can be repeated to create as many coordinated squares as you need.
One of the most appealing features of this easy crochet granny square is the opportunity to experiment with color. The sample design uses a light neutral shade for the center flower, yellow for the second layer of petals, and aqua for the outer square. However, these colors can easily be changed to match a blanket, pillow, bag, table decoration, or other handmade project. Pastels create a delicate spring-inspired appearance, while saturated colors can make the floral structure much more dramatic. Because every round has a distinct purpose, this is also a useful pattern for practicing color changes and learning how crochet motifs develop from the center outward.
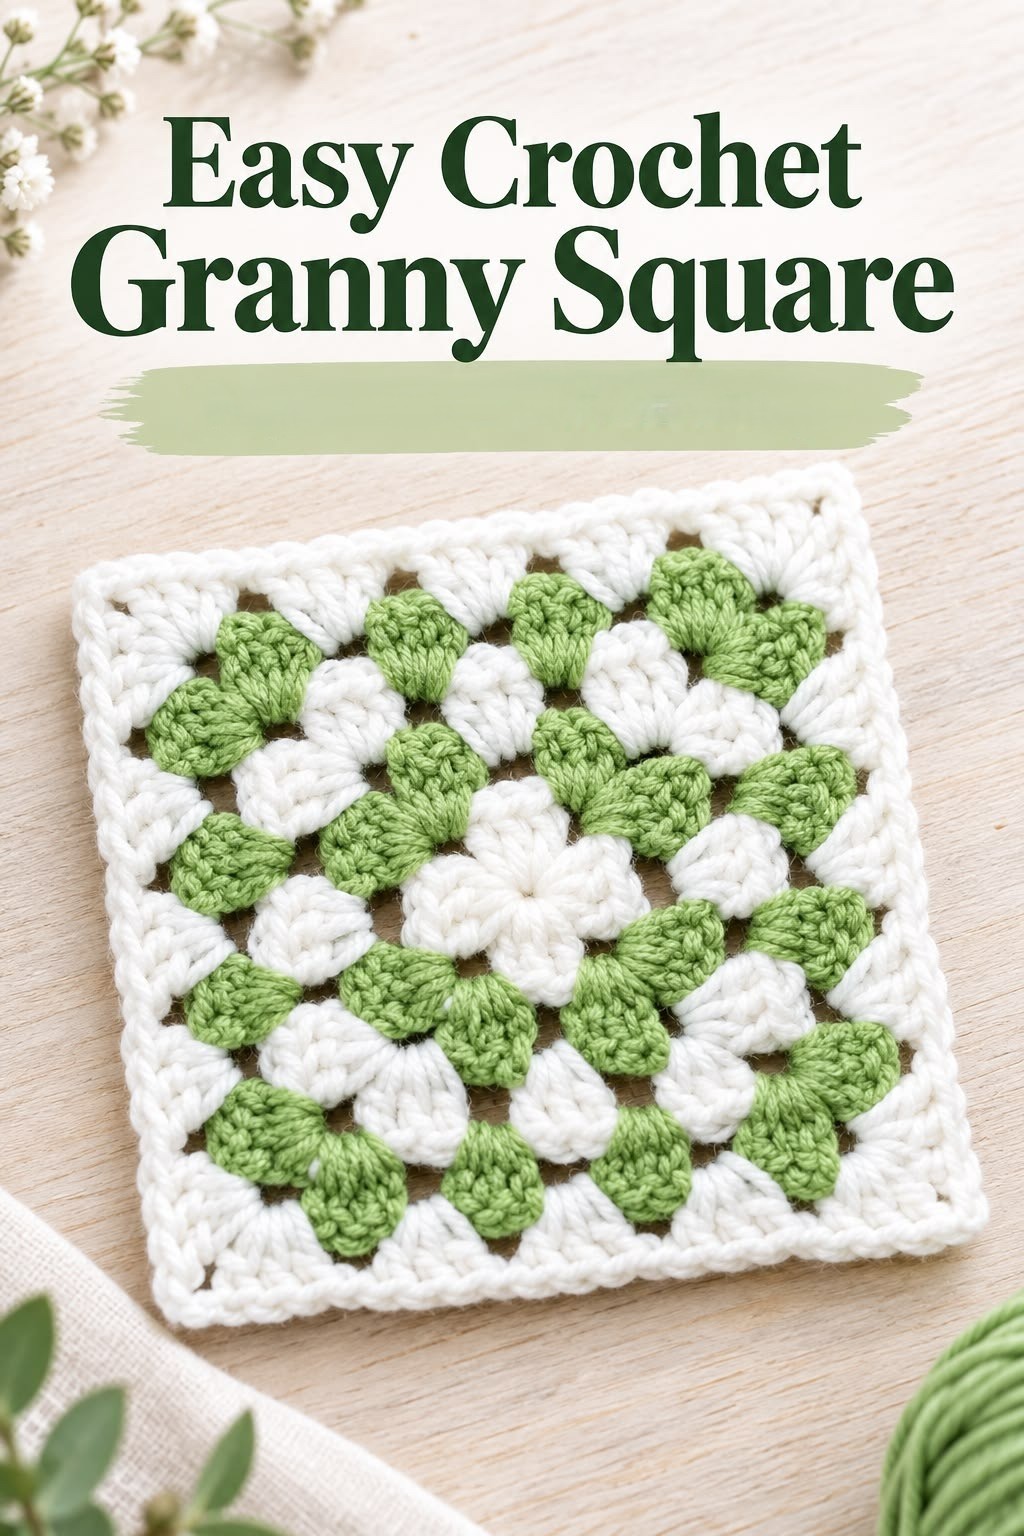
This tutorial uses standard US crochet terminology and explains the construction in a practical round-by-round format. Since yarn thickness, hook size, and personal tension can change the final dimensions, the pattern focuses primarily on stitch structure rather than one mandatory finished size. Before beginning, it helps to recognize the main abbreviations: ch = chain, sl st = slip stitch, sc = single crochet, hdc = half double crochet, dc = double crochet, tr = treble crochet, st = stitch, sp = space, YO = yarn over, and rep = repeat. With those basic crochet keys understood, you can begin building the Crochet Easy Granny Square Pattern from its floral center.
Materials, Crochet Keys, and Preparing the Floral Center
For this Crochet Easy Granny Square Pattern, choose three yarn colors with similar fiber content and weight. A smooth medium or light worsted yarn makes the stitches particularly easy to see while learning. You will also need a crochet hook appropriate for your chosen yarn, scissors, and a yarn needle. If you tend to crochet tightly, moving up one hook size can help the petals remain soft and open rather than stiff.
The central flower begins with a small adjustable ring. Make a magic ring (MR) by wrapping the yarn around your fingers and drawing a loop through the ring with your hook. If you prefer not to use a magic ring, you can ch 4 and join the first chain with a sl st to form a small ring. Either method provides the foundation into which the first group of stitches will be worked.
To begin Round 1, ch 1 to secure the working loop. Work a series of evenly spaced sc stitches into the center ring, arranging them so that the following petal groups can be distributed symmetrically. The important goal is to establish a compact circular foundation without overcrowding it. Join to the first stitch with a sl st, then gently tighten the center if you used a magic ring.
For the first flower layer, attach or continue with the center-petal color. Each petal is created by placing several taller stitches into the same working area. A useful petal sequence is ch 2, 2 dc, 1 tr, 2 dc, ch 2, followed by a sl st into the appropriate base stitch or space. The taller stitch in the middle creates the rounded tip while the double crochets form the sides.
Repeat the same petal sequence evenly around the center until the flower closes into a balanced circular shape. Try to keep every YO and stitch at approximately the same tension. If one petal looks noticeably smaller, gently adjust the loops before proceeding. Crochet flowers often improve considerably after the stitches are lightly shaped with your fingers.
Finish the floral center by joining neatly with a sl st and fastening off if you are changing colors. Weave the yarn tail through several stitches on the back, but avoid pulling so tightly that the center puckers. At this stage, the motif should resemble a small flower with clearly separated petals and a defined center, providing the foundation for the next decorative round.
Adding the Second Petal Round to the Crochet Easy Granny Square Pattern
The second color forms the larger flower surrounding the central petals. Join your new yarn in a space between two petals rather than directly at the tip of a petal. This placement helps the second layer sit behind the first one and creates the dimensional appearance visible in the Crochet Easy Granny Square Pattern. Pull the joining loop firmly enough to secure it without distorting the existing flower.
Begin the first large petal with a short chain. Work several dc stitches into the same space, adding a tr near the middle if you want a taller, more pointed petal. A sequence such as ch 2, 3 dc, 1 tr, 3 dc, ch 2, sl st produces a generous fan shape. Exact stitch counts may be adjusted slightly according to yarn thickness and the amount of space available.
Move to the next gap between the smaller petals and repeat the same sequence. Each group should radiate away from the center. This repeated fan construction is one of the defining elements of a flower granny square pattern, because it creates visual separation between the center and the square-forming rounds that follow.
Continue around the motif, maintaining the same number of tall stitches in every petal. Check the work after every two or three petals. If the piece begins curling strongly upward, your stitches may be too tight or you may need slightly more spacing. If the motif becomes excessively ruffled, reduce the number of stitches or check whether an extra petal group was accidentally added.
When all of the second-round petals are complete, join with a sl st. Lay the motif on a flat surface and gently arrange the petals. They should overlap only slightly, if at all. A little natural texture is normal at this stage because the following round will stabilize the flower and begin changing its circular shape into a square.
Fasten off the second color and weave the yarn tail securely into the back. You now have the decorative heart of the Crochet Easy Granny Square Pattern. Before adding the outer color, identify four evenly spaced positions around the flower. These positions will become the corners, so their placement determines whether the completed granny square looks balanced and symmetrical.
Turning the Crochet Flower into an Easy Granny Square
Attach the outer color in one of the spaces identified for the square-forming round. Ch 3 to bring the yarn to approximately double-crochet height; depending on your preferred method, this beginning chain can count as the first dc. Work additional double crochets into the same area to establish the first cluster. This outer round is where the motif begins changing noticeably from a flower into a square.
To create a corner, work a cluster of tall stitches, make a small chain space, and work another cluster into the same corner area. A practical corner construction is 3 dc, ch 2, 3 dc in the same space. The ch-2 corner space provides enough room for the fabric to turn approximately 90 degrees while keeping the corner flexible.
Between corners, work dc clusters into the available spaces around the flower. Depending on the spacing created by your petal rounds, you may need 3 dc in each suitable gap with ch 1 between groups. The aim is not to force every available opening to hold a cluster. Instead, distribute the groups evenly so each side develops a straight visual line.
At the next marked corner position, repeat 3 dc, ch 2, 3 dc. Continue working side clusters and corner groups around the entire motif. You should finish with four clearly recognizable corners. Counting these corners is one of the easiest ways to detect mistakes before completing the round.
Join the round with a sl st at the beginning stitch or top of the starting chain. Place the square flat and examine each side. If one section appears much longer than another, check whether an extra cluster was worked there. Correcting the stitch count now is easier than trying to compensate during subsequent rounds.
For a larger crochet granny square, continue adding rounds using the same basic principle. Work 3 dc into each chain space along the sides and 3 dc, ch 2, 3 dc into every corner space. As the square expands, additional side spaces naturally appear. This simple repeating structure makes the pattern adaptable for small motifs, larger blocks, and projects assembled from multiple squares.
Finishing, Joining, and Using Your Crochet Easy Granny Square Pattern
Once the square reaches your preferred size, finish the final round with a clean sl st join. Cut the yarn, leaving a tail approximately 10–15 cm long, and pull the tail through the final loop. Thread it onto a yarn needle and weave it through the backs of several stitches. Change direction once while weaving to help prevent the end from working loose during use or washing.
Weaving in ends carefully is particularly important when making a multicolor granny square because each color change produces additional yarn tails. Rather than cutting the ends extremely short, weave each one securely through stitches of the same color whenever possible. This keeps the reverse side tidy and reduces the chance of contrasting yarn showing through the front.
Light blocking can give the completed square a more polished shape. Arrange the motif so all four corners are approximately 90 degrees and the sides are straight. Use a blocking method appropriate for the fiber content of your yarn. Avoid excessive stretching, because blocking should refine the natural shape rather than permanently distort the stitches.
If you are making several squares for a blanket, try to maintain the same yarn, hook size, stitch counts, and tension throughout the project. Even small differences can become noticeable when dozens of motifs are joined. Measuring the first finished square gives you a useful reference for checking the remaining pieces.
Completed squares can be joined with sl st, sc, whip stitch, mattress-style seaming, or another preferred joining technique. A slip-stitch join creates a visible ridge, while a sewn join can look flatter. The right choice depends on whether you want the joining lines to become part of the design or blend quietly into the background.
The finished Crochet Easy Granny Square Pattern works beautifully for blankets, cushion covers, tote bags, table runners, scarves, wall decorations, and other motif-based projects. You can also reverse the color arrangement from square to square. Keeping one background color consistent while changing the flower colors is an easy way to create variety without making the finished project look visually disconnected.
FAQ About the Crochet Easy Granny Square Pattern
Is the Crochet Easy Granny Square Pattern suitable for beginners?
Yes. A beginner who already understands chain stitches, slip stitches, double crochet, treble crochet, and working into spaces can follow the basic construction. The flower adds a little more detail than a traditional granny square, but the repeated petal and cluster sections make the structure easier to remember after the first motif.
What does dc mean in US crochet terminology?
DC means double crochet. To make a US double crochet, YO, insert the hook into the designated stitch or space, YO and pull up a loop, YO and pull through two loops, then YO again and pull through the remaining two loops.
What does tr mean in this crochet pattern?
TR means treble crochet in US terminology. Yarn over twice, insert the hook into the stitch or space, yarn over and pull up a loop. Yarn over and pull through two loops three times until one loop remains. The extra height makes this stitch useful for shaping rounded or pointed petals.
How can I make the granny square larger?
Continue the outer granny-square rounds. Place a 3-dc cluster into each appropriate side space and work 3 dc, ch 2, 3 dc into every corner. Each completed round adds width and creates additional spaces for the next round.
Why is my crochet granny square curling?
Curling can result from tight tension, insufficient stitches, a hook that is too small for the yarn, or incorrectly spaced clusters. First check your stitch count. If it is correct, relaxing your tension or trying a slightly larger hook may help.
Why is my granny square becoming wavy?
Excessive waviness usually indicates too many stitches or increases. Check that you are making additional corner groups only in the four designated corner spaces. Also verify that you have not accidentally added extra clusters along the sides.
Can I use different yarn colors?
Absolutely. Color customization is one of the strongest features of this easy flower granny square. Try a dark center with bright petals, a monochromatic palette, rainbow flowers, seasonal combinations, or scraps left from other crochet projects.
What yarn works best for this pattern?
A smooth yarn with good stitch definition is especially convenient because the petals and clusters remain easy to identify. Cotton can provide crisp definition, while many acrylic yarns offer softness and a large selection of colors. The most important consideration is using compatible yarn weights throughout one square.
Do all my granny squares need to be exactly the same size?
For projects where several blocks will be joined, consistent sizing makes assembly considerably easier. Small differences can often be corrected with gentle blocking, but large variations usually indicate differences in stitch count, yarn weight, hook size, or tension.
Can this pattern be used for a blanket?
Yes. Make multiple Crochet Easy Granny Square Pattern motifs and arrange them before joining. You can repeat identical colors for a coordinated design or change the flower colors while keeping the outer round consistent. After joining the blocks, a crochet border can provide a neat finishing touch.
How do I keep the corners square?
Always identify the four corner spaces and place the full corner increase into each one. A construction such as 3 dc, ch 2, 3 dc creates both the increase and turning space needed for a defined corner. Checking the square after every round can prevent errors from accumulating.
Can I make this pattern with leftover yarn?
Yes. Small floral granny squares are excellent scrap yarn crochet projects because the inner rounds require relatively small quantities of each color. For the most consistent results, combine yarns of similar weight and thickness.
Conclusion
Video Tutorial:
The Crochet Easy Granny Square Pattern combines the familiar versatility of a granny square with the decorative appeal of a layered crochet flower. Starting from the center and working outward teaches several valuable techniques, including creating a foundation ring, making shaped petals, changing colors, working dc clusters, establishing ch-2 corner spaces, and turning a circular motif into a balanced square.
The most important idea is to work carefully through each stage rather than rushing to the outer rounds. First create the small central flower, add the larger contrasting petals, identify four evenly spaced corner positions, and then use traditional granny-style clusters to establish the square. Once those four corners are correctly positioned, additional rounds become much easier and can be repeated until the motif reaches the size you need.
With practice, this easy crochet granny square can become a flexible foundation for countless handmade projects. Experiment with yarn colors, repeat the motif for a larger design, and use your favorite joining method to transform individual blocks into something completely personal. If you try this Crochet Easy Granny Square Pattern, leave your sincere opinion about the pattern and share any suggestions, color combinations, or project ideas you would like to see explored next.