Creating a heart quilt is a heartfelt way to bring warmth and love into your home or as a special gift.
This guide will walk you through the steps of making a heart quilt pattern using specific fabric cuts and measurements.
With detailed instructions and tips on achieving precision, you’ll find this project as enjoyable as it is rewarding.

Materials and Fabric Preparation
The first step in any quilt project is gathering materials and ensuring you have everything you need. For this heart quilt, you’ll need fabric in different colors, a rotary cutter, a cutting mat, rulers, pins, and, of course, a sewing machine.
- Fabric Choices: Select at least two contrasting fabrics for your heart quilt. One will be used for the heart itself, and the other for the background. Consider using cotton or quilting fabrics, as they are easier to work with and offer durability. Aim for reds and pinks for the hearts, but you can get creative with your palette.
- Fabric Yardage: For a small lap quilt, you’ll need approximately 2 yards of background fabric, 1 yard for the heart fabric, and ½ yard for borders and binding. Always wash and press your fabric before cutting to ensure accuracy in your quilt patterns.
- Cutting the Fabric: Use a rotary cutter and ruler to cut your fabric into the necessary shapes. For this heart quilt pattern, you will need 5-inch squares for the background and heart pieces. You will also need to cut strips measuring 2.5 inches wide for the border and binding.
Making the Heart Blocks
The next step in the process is to make the heart blocks. These blocks will be the main feature of your heart quilt pattern and require careful attention to detail.
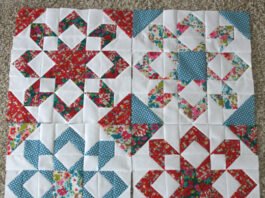
- Constructing the Heart Block: Begin by placing two 5-inch background squares with two 5-inch heart squares, right sides together. Mark a diagonal line on the back of the background fabric, and sew a ¼-inch seam along both sides of the line. Cut along the marked line and press open to reveal two half-square triangles (HSTs).
- Assembling the Heart Shape: Lay out your HSTs in a 3×3 grid to form a heart shape. Place two HSTs on the top row to form the heart curves, two in the middle, and the remaining background squares for the outer parts. Sew the blocks together, row by row, using a ¼-inch seam allowance.
- Joining Heart Blocks: After assembling the heart blocks, join them together to create rows for your quilt. For a lap quilt, you can use a 4×4 grid of hearts, making 16 blocks total. Ensure that the seams are aligned to create a clean and cohesive look in your quilt patterns.
Adding Borders and Sashing
Adding borders and sashing gives your heart quilt a polished, professional finish. These elements will frame your quilt and enhance the overall design.
- Cutting the Sashing: Sashing strips are the horizontal and vertical strips that separate your quilt blocks. Cut your sashing strips to measure 2.5 inches wide by the length of your blocks. For this project, you will need 12 strips for the sashing between the heart blocks.
- Attaching the Sashing: Attach the sashing strips between each of the heart blocks, both horizontally and vertically. Sew with a ¼-inch seam, and press the seams toward the sashing to reduce bulk. Repeat this process for each row of hearts until your heart quilt pattern is fully assembled.
- Adding Borders: Borders frame your quilt and provide a finishing touch. Cut your border strips to 2.5 inches wide and the length of your quilt top. Attach the border strips to the sides first, followed by the top and bottom. Press the seams away from the quilt center.
 Quilting the Heart Quilt
Quilting your heart quilt is the process of sewing the layers (top, batting, and backing) together. This step not only adds design but also ensures durability.
- Layering the Quilt: Create your quilt sandwich by laying the backing fabric right side down, placing the batting on top, and finally laying your quilt top right side up. Smooth out any wrinkles, and pin or baste the layers together.
- Choosing a Quilting Design: You can quilt your heart quilt with a variety of designs. Straight-line quilting along the seams is a simple and effective option. Alternatively, you can opt for free-motion quilting to create swirls or other intricate patterns that complement the heart shapes.
- Quilting the Layers Together: Begin quilting in the center of your heart quilt and work your way outwards. This method helps prevent wrinkles or puckers in the quilt top. Use a walking foot if you’re doing straight-line quilting or a darning foot for free-motion quilting.

Binding and Finishing
Once your quilt top is quilted, it’s time to bind the edges. This final step not only secures the quilt layers but also adds a clean finish to your quilt patterns.
- Preparing the Binding: Cut your binding strips to 2.5 inches wide. Fold each strip in half lengthwise, wrong sides together, and press. This creates a double-fold binding that will encase the raw edges of your quilt.
- Attaching the Binding: Start by sewing the binding to the front of the quilt with a ¼-inch seam, leaving a 6-inch tail for joining the ends. Miter the corners as you reach them for a neat finish. After attaching, fold the binding over the quilt edge and sew it to the back, either by hand or machine.
- Finishing the Quilt: Once the binding is attached, give your quilt one final press and check for any loose threads. Congratulations, your heart quilt is complete! This cozy and charming quilt will bring warmth and a handmade touch to any space.
PATTERN HERE
Creating a heart quilt is a rewarding project that brings together quilt patterns with a loving theme. Whether you’re making it as a personal keepsake or gifting it to a loved one, the craftsmanship and care in each stitch are evident. Remember to take your time with the cutting, piecing, and quilting processes to ensure a polished and beautiful finish.
This heart quilt pattern can be customized in various ways, from the size of the quilt to the colors and fabrics used. Once you’ve mastered this design, feel free to experiment with different variations and layouts. Happy quilting!


