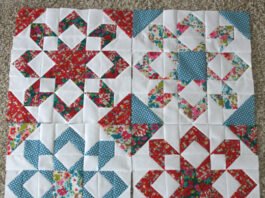
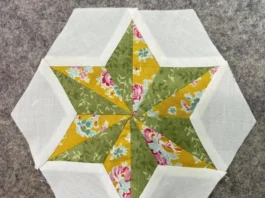
Creating a beautiful quilt often starts with a single, well-designed block. One such block that has captured the hearts of many quilting enthusiasts is the Double Sawtooth Star Block.
Known for its intricate design and versatility, this block is a must-learn for any quilter aiming to enhance their skills and add a touch of elegance to their projects.
In this tutorial, we’ll walk you through the step-by-step process of creating a Double Sawtooth Star Block, complete with precise fabric cuts and measurements. Let’s dive into the world of quilt patterns and start sewing!

What is a Double Sawtooth Star Block?
The Double Sawtooth Star Block is a traditional quilt pattern that features a star within a star, creating a dynamic and visually appealing design. This pattern is composed of two layers of star points that interlock, giving it a three-dimensional effect that stands out in any quilt. The double star design not only adds complexity but also allows for creative use of colors and fabrics.
Historically, the Sawtooth Star has been a popular choice among quilters, dating back to the early 19th century. The Double Sawtooth variation adds an extra layer of detail and interest, making it a favorite in contemporary quilting projects. Whether used as a standalone block or repeated across an entire quilt, this pattern offers endless possibilities.
Quilters love the Double Sawtooth Star Block for its versatility. It can be made in various sizes, from small blocks that create intricate patterns to larger blocks that make bold statements. The design also lends itself well to different color schemes, allowing quilters to experiment with contrasting fabrics or subtle, monochromatic palettes.
Materials and Fabric Requirements
Before starting your Double Sawtooth Star Block, gather the necessary materials. You’ll need a selection of fabrics, a rotary cutter, a cutting mat, a quilting ruler, pins, an iron, and a sewing machine. For the fabric, choose at least three different colors or patterns to highlight the star layers and background.
For a 12-inch finished Double Sawtooth Star Block, you’ll need the following fabric cuts:
- Center Square: One 4.5-inch square.
- Inner Star Points: Eight 2.5-inch squares.
- Outer Star Points: Eight 3.5-inch squares.
- Background: Four 4.5-inch squares, four 2.5-inch squares, and four 3.5-inch squares.
Selecting the right fabric is crucial for achieving the desired visual impact. Opt for high-contrast colors to make the star points pop against the background. Patterns such as florals, geometrics, or solids can be mixed and matched to create a unique look. Pre-wash your fabrics to prevent any shrinking or color bleeding.

Cutting Your Fabric
Cutting your fabric accurately is the first step to a successful quilt block. Lay out your fabric on a cutting mat, ensuring it is smooth and wrinkle-free. Using a rotary cutter and quilting ruler, carefully cut the fabric pieces according to the measurements specified.
Begin by cutting the center square from your chosen fabric. This will be the focal point of your Double Sawtooth Star Block. Next, cut the inner star points from a contrasting fabric. These smaller squares will be used to create the first layer of star points surrounding the center square.
For the outer star points, use a third fabric to cut the larger squares. These will form the second layer of star points, giving the block its distinctive double star appearance. Lastly, cut the background pieces from a neutral fabric to frame the star and complete the block. Double-check all measurements to ensure accuracy and consistency.
Assembling the Inner Star
To assemble the inner star, start by creating half-square triangles (HSTs). Pair each 2.5-inch inner star point square with a 2.5-inch background square. Draw a diagonal line on the background squares and sew 1/4 inch on either side of the line. Cut along the drawn line to create two HSTs from each pair.
Press the HSTs open, with seams pressed towards the darker fabric. Trim each HST to 2.5 inches square if necessary. Next, arrange the HSTs around the center square to form the star points. Ensure the orientation of the HSTs creates the desired star shape.
Sew the HSTs together in rows, then join the rows to complete the inner star. Press the seams open or to one side, depending on your preference. The inner star is now complete and ready to be incorporated into the outer star design.
Constructing the Outer Star
For the outer star, repeat the HST process with the 3.5-inch outer star point squares and the 3.5-inch background squares. Pair each star point square with a background square, draw a diagonal line, sew 1/4 inch on either side, and cut along the line to create HSTs. Press and trim the HSTs to 3.5 inches square.
Arrange the outer star HSTs around the completed inner star. Position them so that they form the second layer of star points. This will create the double star effect that defines the Double Sawtooth Star Block. Ensure the star points are aligned correctly for a cohesive look.
Sew the outer star HSTs together in rows, then join these rows to the inner star block. Press the seams as desired. At this stage, you should have a completed Double Sawtooth Star Block, with both inner and outer star points clearly visible.

Finishing the Block
After constructing the star, it’s time to add the final background pieces to complete the block. Attach the 4.5-inch background squares to each corner of the block. This will frame the star and give the block its finished 12-inch size.
Sew the corner squares to the corresponding edges of the block. Press the seams towards the background fabric to reduce bulk and create a smooth finish. Your Double Sawtooth Star Block is now complete and ready to be incorporated into your quilt.
Consider repeating this block to create a stunning quilt top. The Double Sawtooth Star Block can be arranged in various layouts to create different visual effects. Whether you choose a traditional grid or a more modern, offset design, this block will add beauty and complexity to your quilt patterns.
Tips and Tricks for Success
Accuracy is key when creating quilt blocks. Ensure all your fabric cuts are precise and that your seams are consistent at 1/4 inch. This will help the pieces fit together perfectly and maintain the intended dimensions of the block.
Pressing is an important step in quilting. Press your seams carefully after each step to ensure the block lays flat and the seams are crisp. Use a hot iron and a pressing cloth to avoid scorching your fabric.
Experiment with colors and patterns to make your Double Sawtooth Star Block unique. Don’t be afraid to try bold combinations or subtle blends. The beauty of quilting lies in the creativity and personal touch each quilter brings to their work.
Conclusion
Creating a Double Sawtooth Star Block is a rewarding experience that enhances your quilting skills and adds a striking element to your projects. With careful fabric selection, precise cutting, and meticulous sewing, you can achieve a beautiful and intricate quilt block. This tutorial provides a comprehensive guide to making the Double Sawtooth Star Block, empowering you to incorporate this classic pattern into your next quilt. Happy quilting!
By following this step-by-step guide, you’ll master the Double Sawtooth Star Block, a timeless and versatile design perfect for any quilt. Incorporate this stunning block into your quilt patterns, and watch your quilting projects come to life with elegance and style.


