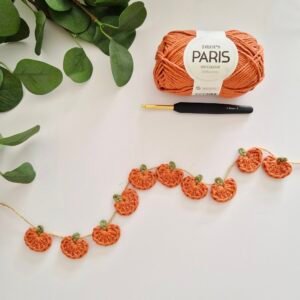
The Mini Pumpkin Crochet Pattern is a delightful project for crafters of all skill levels who want to add a cozy, handmade touch to their seasonal décor. Whether you’re preparing for autumn, Thanksgiving, or Halloween, crocheting your own mini pumpkins is a creative way to express your personality and enhance your home. These small and charming pumpkins are quick to make, highly customizable, and ideal for gifts, markets, or simply brightening up your living space. Using a crochet mini pumpkin design gives you endless possibilities in color, texture, and size to match your desired theme.
Working with a mini pumpkin crochet pattern is also a great way to practice your stitches, learn new techniques, and enjoy the relaxing benefits of crochet. Because they are small, these pumpkins are perfect for using leftover yarn and experimenting with different hook sizes. You can make a whole set of these adorable items in just an afternoon, making them both fun and practical. Additionally, crochet mini pumpkins can be adapted to suit various styles – from rustic farmhouse to modern minimalist – making them versatile decorations for any occasion.
Another reason crafters love the crochet mini pumpkin trend is how easy it is to personalize each piece. By changing the yarn weight, adding embellishments like leaves or stems, or experimenting with different stitch patterns, you can create an entire pumpkin patch of unique designs. Not only does this project allow you to express your creativity, but it also provides a relaxing and rewarding crafting experience. With the right mini pumpkin crochet pattern, you can turn even the simplest stitches into something special.
Understanding the Mini Pumpkin Crochet Pattern
The mini pumpkin crochet pattern is essentially a small, rounded shape created by crocheting a rectangle, sewing it into a tube, and then shaping it into a pumpkin. Because of its simple construction, it’s a great beginner project and can be made with any yarn type or hook size. Learning the basic structure of the crochet mini pumpkin will help you master the technique quickly and adapt it to your style.
Each crochet mini pumpkin begins with creating a flat piece, usually with simple stitches like single crochet or half-double crochet. Once the desired length and width are achieved, the piece is stitched together to form a cylinder. The ends are then cinched or gathered, creating the signature pumpkin shape. Stuffing is added before closing the final end to ensure the pumpkin retains its plump, round appearance.
This construction method allows even new crocheters to feel confident. By using straightforward stitches and easy assembly techniques, you can complete a mini pumpkin crochet pattern without frustration. Over time, as your skills grow, you can experiment with textured stitches or color changes to give each pumpkin its own personality.
One of the best things about the mini pumpkin crochet pattern is its flexibility. Whether you want a tiny pumpkin for a keychain or a larger one for a centerpiece, simply adjust the starting chain length and number of rows. This means the same pattern can produce pumpkins of various sizes.
Moreover, many people enjoy adding unique features to their crochet mini pumpkins like crocheted stems, fabric leaves, or even beads for a whimsical touch. This level of customization allows crafters to create themed sets for holidays or gift giving.
In essence, understanding the basic structure of the mini pumpkin crochet pattern gives you a strong foundation for countless variations. Once you’ve mastered the simple version, the possibilities for creativity are endless.
Materials and Tools for Crochet Mini Pumpkins
To successfully follow a mini pumpkin crochet pattern, you’ll need a few basic materials and tools. These are simple items that most crocheters already have on hand, making this project convenient and accessible.
First, choose your yarn. A medium-weight yarn is typically recommended for a standard crochet mini pumpkin, but you can experiment with chunky or fine yarn to create different textures and sizes. Cotton yarn offers a clean, defined stitch look, while acrylic or blended yarns give a softer, cozier appearance.
Next, select the appropriate crochet hook size. The hook size will depend on your yarn choice and the desired tightness of your stitches. A slightly smaller hook than recommended for the yarn will produce a firmer pumpkin that holds its shape better. Always check your gauge before starting your mini pumpkin crochet pattern to ensure consistency.
You’ll also need stuffing material to give your pumpkin its shape. Fiberfill is the most common choice, but you can also use yarn scraps for a more eco-friendly option. Don’t forget a yarn needle for sewing the sides and closing the ends of your pumpkin.
Optional materials include contrasting yarn for stems, embroidery floss for detailing, or even felt pieces for adding leaves or vines. These little extras help personalize your crochet mini pumpkin and make it unique.
Keep scissors, stitch markers, and measuring tape handy as well. These tools help you keep your work neat, accurate, and efficient. With these supplies, you’re ready to tackle your mini pumpkin crochet pattern with confidence.
Finally, remember that practice makes perfect. If your first crochet mini pumpkin doesn’t turn out exactly as you envisioned, don’t be discouraged. The simplicity of this project makes it easy to try again and improve with each attempt.
Step-by-Step Guide to Making a Crochet Mini Pumpkin
Following a mini pumpkin crochet pattern step by step ensures a neat and professional-looking finished product. The process can be broken down into simple stages so even beginners can follow along.
Start by creating a foundation chain of the desired length. This chain will determine the width of your crochet mini pumpkin. Work rows of single crochet or half-double crochet stitches until you achieve the desired height. The resulting rectangle will be the body of your pumpkin.
Next, fold the rectangle in half with the right sides together and seam the short edges to form a tube. Use a whip stitch or slip stitch to secure the edges. At this point, you’ve created the base for your mini pumpkin crochet pattern.
With one open end of the tube, thread your yarn needle and weave around the edge. Pull tightly to close the opening, leaving the other end open for stuffing. This step helps form the base of the pumpkin.
Now, stuff the pumpkin with fiberfill until it reaches your preferred plumpness. Don’t overfill, as this can distort the shape of your crochet mini pumpkin. Once stuffed, weave your yarn needle around the remaining open end and pull tightly to close.
To create the signature pumpkin ridges, use a long strand of yarn and wrap it vertically from top to bottom, pulling slightly to form sections. Repeat several times around the pumpkin to achieve the classic segmented look. Tie off securely and weave in ends.
Finally, crochet or attach a small stem at the top of your mini pumpkin crochet pattern. You can also add leaves, tendrils, or other embellishments at this stage. Your adorable handmade pumpkin is now complete.
Creative Ideas and Uses for Crochet Mini Pumpkins
A mini pumpkin crochet pattern can be more than just a simple decoration. With a little imagination, these tiny pumpkins can become functional and decorative items for your home or events.
One popular use is as festive table décor. Scatter several crochet mini pumpkins across a dining table for a charming fall centerpiece. Mix different sizes and colors for a rustic, playful look.
You can also turn your mini pumpkin crochet pattern into a practical item. For instance, add a loop at the top to create a keychain or bag charm. Smaller pumpkins can be stuffed with scented materials to act as natural air fresheners or sachets.
For gift giving, a set of crochet mini pumpkins makes a thoughtful handmade present. Package them in a basket or box for an autumn-themed gift that your friends and family will cherish.
Crafters often use these pumpkins for craft fairs or online shops. Because they’re quick and inexpensive to make, mini pumpkin crochet patterns are ideal for selling in sets or as seasonal products.
Finally, don’t be afraid to experiment with unconventional colors. While orange is traditional, white, green, or even pastel pumpkins can add a modern or whimsical twist to your décor. With the right crochet mini pumpkin design, you can create something truly one-of-a-kind.
These creative applications make the mini pumpkin crochet pattern a versatile and rewarding project that goes far beyond seasonal decoration.
FAQ About Mini Pumpkin Crochet Patterns
1. How long does it take to make a crochet mini pumpkin?
Most crochet mini pumpkins can be completed in under an hour, depending on your skill level and the size of the pumpkin. Beginners may take a bit longer, but the process is simple enough for quick results.
2. What is the best yarn for a mini pumpkin crochet pattern?
Medium-weight yarn is ideal for beginners because it’s easy to handle. However, you can experiment with chunky or fine yarn to achieve different looks for your crochet mini pumpkins.
3. Can I make a mini pumpkin crochet pattern without stuffing?
Stuffing gives the pumpkin its plump shape. While you can make an unstuffed version, it may not hold the classic rounded form. Using fiberfill or yarn scraps is recommended for best results.
4. How do I make my crochet mini pumpkin look more realistic?
To achieve a realistic look, add ridges by wrapping yarn vertically around the pumpkin after stuffing. You can also use natural colors and add a crocheted stem or leaves for added detail.
5. Can I sell the crochet mini pumpkins I make from a pattern?
Yes, you can sell your handmade crochet mini pumpkins. Just make sure the pattern you’re following allows for commercial use if it’s from another designer.
6. How do I adjust the size of my mini pumpkin crochet pattern?
To make a larger pumpkin, increase the starting chain and add more rows. For a smaller pumpkin, reduce the number of stitches and rows. The process remains the same regardless of size.
Video Tutorial
The Mini Pumpkin Crochet Pattern is a fun, versatile, and rewarding project perfect for all skill levels. From seasonal décor to thoughtful handmade gifts, these little pumpkins offer endless creative possibilities. By mastering the simple steps and experimenting with colors, textures, and embellishments, you can create a unique collection of crochet mini pumpkins that showcase your style.
We hope this article has inspired you to pick up your hook and try a mini pumpkin crochet pattern for yourself. If you’ve made your own or have tips to share, please leave a sincere opinion and suggestions in the comments – your feedback helps others and keeps the crochet community thriving!