If you’ve been searching for the perfect accent to brighten up your living room or bedroom, this Free Pattern – Striped Bow Pillow is the ideal project to start. With a playful mix of colors and textures, this pillow adds charm and coziness to any space. Whether you’re a beginner or a seasoned sewist, this pattern is easy to follow and deeply rewarding to complete.
The best part? You don’t need to invest in expensive materials or complicated tools. This Free Pattern – Striped Bow Pillow is designed with simplicity and style in mind. Using basic sewing techniques, leftover fabric scraps, and a love for DIY decor, you can create a beautiful handmade item that feels straight out of a boutique.
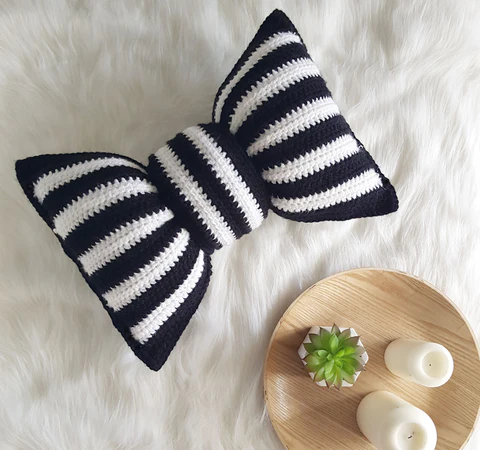
Adding bows to your cushions brings a whimsical, modern twist to traditional pillows. The striped element makes it perfect for mixing and matching with different interior styles—from farmhouse to minimalist to eclectic. This is one of those handmade pieces that speaks volumes, yet takes little time to make. Let’s explore every step of making this beauty from scratch.
1. Gathering Materials and Preparing Your Fabric
To begin your Free Pattern – Striped Bow Pillow, you need to assemble a few basic materials. This is a scrap-friendly project, so it’s perfect for using leftover fabrics in your stash.
Choose cotton, linen, or canvas for durability. Striped patterns in various widths create a visual rhythm and add extra personality to the pillow. You’ll also need a pillow insert or stuffing, thread in coordinating colors, fabric scissors, sewing pins or clips, and a sewing machine.
Start by cutting your main pillow fabric into two square pieces (e.g., 16″ x 16″). Then, prepare the bow strip by cutting a piece approximately 6″ x 20″. If you want a fuller bow, increase the length or width slightly to fit your style.
Fold the bow strip in half lengthwise, right sides together, and sew along the long edge. Turn it right side out and press it flat with an iron. Now you have a crisp bow ready to be added to your Free Pattern – Striped Bow Pillow.
Before stitching the pillow front and back together, decide where you want the bow placed. This visual decision sets the tone for your whole design. You can center it, place it slightly off to one side, or even add two bows for a double effect.
Once you’ve pinned the bow in place on the front panel, do a quick basting stitch to secure it. This helps hold the bow steady when you assemble the pillow, ensuring everything stays aligned.
For the pillow back, you can choose a solid fabric to balance the visual weight of the striped front, or continue the striped theme. Either way, keep the overall aesthetic cohesive.
2. Sewing and Assembling the Pillow
Now that your bow is secure and your fabrics are cut, it’s time to assemble the Free Pattern – Striped Bow Pillow. This is where the project starts to come together beautifully.
Lay the front and back pieces right sides together. Pin or clip all four edges neatly, taking care that the bow stays in place and doesn’t shift during sewing. Remember to leave a 4–5″ opening on one side to turn the pillow right side out and insert the pillow form.
Sew around the edges with a 1/2″ seam allowance, backstitching at the beginning and end to reinforce your stitching. Clip the corners diagonally to reduce bulk, then gently turn the pillow right side out through the opening.
Use a point turner or the blunt end of a pencil to carefully shape the corners. Press the entire pillow with an iron to give it a clean, crisp appearance before inserting the pillow form.
If you’re using loose stuffing instead of a pillow insert, begin filling the corners first and work your way to the center for even distribution. Be sure to fill it firmly so the Striped Bow Pillow holds its shape well.
Once filled, close the opening using a ladder stitch or topstitching method. If done neatly, this step will be invisible and blend perfectly with the rest of your seams.
After stitching the opening shut, fluff the pillow and adjust the bow to your liking. You can sew a few small tacking stitches to hold the bow’s center in place if it needs extra security.
Take a moment to admire your work! You’ve just completed your very own Free Pattern – Striped Bow Pillow, and it looks stunning whether placed on a couch, chair, or bed.
3. Customizing the Look and Style
One of the best things about this Free Pattern – Striped Bow Pillow is how easily customizable it is. You can make it match any color scheme or room theme by simply switching fabrics or adjusting the size.
Try using bold and bright stripes for a child’s room or soft pastels for a shabby chic vibe. You can also experiment with textures by combining cotton and velvet or adding lace trim along the bow edges.
For seasonal décor, choose festive prints like red and green stripes for Christmas, or sun-washed yellows for summer. The pattern remains the same; it’s the fabric that transforms the mood.
Another fun variation is to create a two-sided pillow: one side with the bow, the other with a fun applique or embroidery. This gives you more styling options depending on your mood or occasion.
If you’re giving this pillow as a handmade gift, personalize it by adding initials or a small label. Handmade gifts like the Striped Bow Pillow are perfect for birthdays, housewarmings, or baby showers.
You can even make a matching set with different stripe directions or bow sizes. A trio of pillows with coordinating bows makes a beautiful display on a large couch or a guest bed.
The key to a standout pillow is thoughtful details. Choose buttons, trims, or topstitching in a way that complements your design but doesn’t overwhelm the classic elegance of the bow.
4. Care Tips and Styling Suggestions
Now that your Free Pattern – Striped Bow Pillow is complete, it’s important to know how to care for it so it remains in excellent condition. Handmade items deserve extra love and attention.
If you’ve used washable fabric, you can gently hand wash or machine wash the pillow cover on a delicate cycle. Always remove the insert if possible before washing. Lay flat or hang to dry for best results.
To keep the bow neat, reshape it slightly after every wash. Press lightly with a steam iron to remove wrinkles and keep the stripes crisp and defined.
When styling your home with this pillow, consider placing it in a group of cushions with complementary tones. A striped pillow with a bow becomes a statement piece in a mix of textures and shapes.
Use it as a decorative cushion on reading chairs, in cozy nooks, or layered on beds for a boutique hotel feel. The bow adds just the right amount of charm and softness.
Don’t be afraid to rotate your pillows with the seasons. The Free Pattern – Striped Bow Pillow adapts well to various moods and events, giving you flexibility throughout the year.
Finally, remember that handmade items carry your personal touch and style. Every stitch reflects your creativity, and that’s what makes this Striped Bow Pillow not just decor—but a story.
FAQ – Frequently Asked Questions
Q: Can beginners make the Free Pattern – Striped Bow Pillow?
A: Yes! This project is beginner-friendly. The steps are simple and well-suited to those who are just learning to sew.
Q: What type of fabric is best for this pillow?
A: Cotton, linen, or lightweight canvas works best. These fabrics are easy to sew and hold the bow’s shape well.
Q: How do I keep the bow from drooping?
A: Use interfacing on the bow strip if needed, or tack it lightly by hand in the center to hold it in place.
Q: Can I make this pillow in different sizes?
A: Absolutely! Adjust the dimensions of the front and back panels and the bow strip to create small or large pillows.
Q: How do I wash the pillow without damaging the bow?
A: Remove the insert, gently hand wash the cover, and reshape the bow while drying. Avoid wringing or twisting the fabric.
Q: Can I use this pattern to sell pillows at craft fairs?
A: Yes, as long as it’s your handmade creation. Just be sure to credit the design as a Free Pattern – Striped Bow Pillow if required by the source.
Making your own Free Pattern – Striped Bow Pillow is not only a creative and satisfying activity—it also gives your space a unique, handmade touch that no store-bought pillow can match. From choosing fabrics to sewing on the final bow, each step invites you to express your personal style.
Whether you’re decorating your own home, crafting for a loved one, or preparing for a handmade market, this project is a joyful way to bring charm into everyday spaces. Don’t hesitate to try different color combinations and styling ideas as you grow more confident in your sewing skills.
We’d love to hear how your pillow turned out! Please leave your honest opinion, share tips you discovered along the way, or suggest ideas for future projects. Your feedback helps keep the creative spirit alive!


