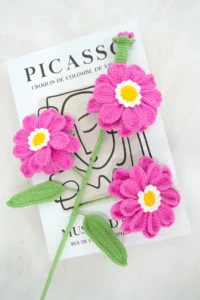
If you are looking for a Crochet Zinnia Pattern Free, you have come to the right place! This article provides a free pattern and a step-by-step tutorial to help you create beautiful crochet zinnias. Whether you are a beginner or an experienced crocheter, you will find this guide easy to follow and highly rewarding.
Crocheting flowers is a fantastic way to add handmade charm to your projects. Crochet zinnias can be used in various crafts, such as home decor, accessories, and gifts. With the free tutorial provided, you will learn how to create stunning zinnias using simple stitches and techniques. Plus, you will get valuable tips on yarn selection, color combinations, and finishing touches.
Let’s dive into this comprehensive guide and start creating your own crochet zinnias today!
1. Materials and Tools Needed
Before you begin working on your Crochet Zinnia Pattern Free, make sure you have the right materials. Having the correct tools ensures your zinnias turn out beautifully and last a long time.
- Yarn Selection: Choose high-quality cotton or acrylic yarn in vibrant colors to mimic real zinnias.
- Crochet Hook: Use the recommended hook size according to your yarn choice (usually 3.0mm to 4.5mm).
- Tapestry Needle: This will help in weaving in loose ends and assembling the flower.
- Scissors: A sharp pair of scissors is essential for cutting yarn cleanly.
- Stitch Marker: Useful for marking stitches, especially if working on complex designs.
- Floral Wire (Optional): If you plan to create a bouquet, floral wire will help structure your crochet flowers.
Using the right materials ensures that your crochet zinnias have a neat and professional finish. Don’t hesitate to experiment with different yarn textures and colors for unique results.
2. Step-by-Step Crochet Zinnia Pattern Free Tutorial
Now that you have gathered your materials, let’s move on to the Crochet Zinnia Pattern Free tutorial. Follow these simple steps to create a stunning crochet zinnia.
- Step 1: Create the Magic Ring – Start with a magic ring and work single crochets (SC) into the loop to form the flower’s center.
- Step 2: First Layer of Petals – Work double crochets (DC) into the base stitches, forming small loops for the first petal layer.
- Step 3: Second Layer of Petals – Increase the petal count by working into the back loops of the previous stitches.
- Step 4: Third Layer of Petals – Continue adding depth by making longer stitches, such as treble crochets (TR), for a fuller bloom.
- Step 5: Weaving in Ends – Use a tapestry needle to neatly secure any loose yarn ends to keep the flower intact.
- Step 6: Shaping and Finishing – If necessary, lightly press the petals with a warm iron and arrange them for a natural look.
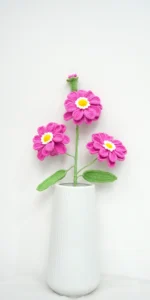
This simple free pattern allows you to create a lifelike zinnia in just a few steps. Once completed, your flower can be used for decorations, hair accessories, or even in crochet bouquets.
3. Creative Ways to Use Crochet Zinnias
Now that you’ve completed your crochet zinnia, let’s explore creative ways to use these beautiful handmade flowers.
- Home Decor: Attach your zinnias to pillow covers, curtains, or table runners for a cozy touch.
- Garlands and Wreaths: String multiple crochet zinnias together to create stunning floral garlands.
- Accessories: Turn your flowers into brooches, hair clips, or embellishments for hats and bags.
- Gift Wrapping: Add a crochet zinnia to gift packages for a personalized handmade touch.
- Bridal and Event Decor: Use crochet zinnias in bouquets, corsages, or wedding decorations for a unique floral theme.
- Keychains and Bookmarks: Attach a small crochet zinnia to keychains or bookmarks for practical and stylish accessories.
By incorporating crochet zinnias into different crafts, you can showcase your creativity and make thoughtful gifts for loved ones.
4. Tips for Perfect Crochet Zinnias
To ensure your Crochet Zinnia Pattern Free turns out flawless, follow these essential tips.
- Choose the Right Yarn: Soft, flexible yarn works best for shaping delicate petals.
- Maintain Consistent Tension: Keep your stitches uniform to achieve a polished look.
- Experiment with Colors: Use gradient yarns or mix multiple colors for a realistic effect.
- Block Your Flowers: Lightly steam block your crochet zinnias to enhance their shape and structure.
- Secure Loose Ends: Weave in all yarn ends properly to prevent unraveling.
- Practice Different Sizes: Adjust hook sizes and stitch counts to create zinnias in various dimensions.
With these expert tips, your crochet zinnias will look professional and last for years to come.
FAQ – Frequently Asked Questions
1. Can beginners make crochet zinnias?
Yes! This Crochet Zinnia Pattern Free is beginner-friendly and requires only basic stitches like single crochet (SC), double crochet (DC), and treble crochet (TR).
2. What type of yarn is best for crochet flowers?
Cotton and acrylic yarns are ideal because they hold their shape well and offer vibrant color options.
3. How long does it take to crochet a zinnia?
It typically takes 30 minutes to 1 hour, depending on skill level and flower size.
4. Can I use these flowers for outdoor decor?
Yes, but it’s best to use weather-resistant yarn and apply a protective fabric stiffener.
5. How do I attach crochet zinnias to other projects?
You can sew them directly onto fabric, use glue, or attach a pin backing for easy application.
6. Can I make a bouquet with crochet zinnias?
Absolutely! Use floral wire to attach multiple zinnias and arrange them into a bouquet.
Creating a Crochet Zinnia Pattern Free is a rewarding and creative way to add beauty to your projects. By following this free tutorial, you can craft stunning crochet zinnias for various uses, from home decor to accessories. Remember to experiment with colors, maintain even tension, and use high-quality yarn for the best results.
We would love to hear your thoughts! Leave a comment with your opinion and any suggestions for future crochet tutorials. Happy crocheting!


