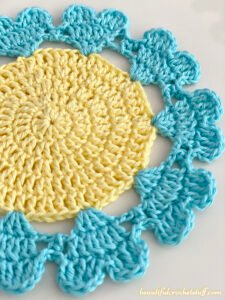
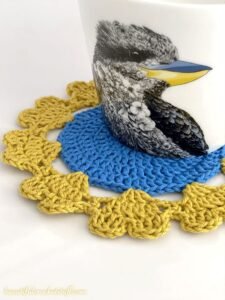
If you’re searching for a lovely and practical way to add charm to your table décor, the Crochet Heart Coaster Free Pattern – Free Tutorial is the perfect project. This heart-shaped crochet coaster is not only cute and quick to make but also a fantastic gift idea for Valentine’s Day, anniversaries, or simply to show someone you care. In this article, you’ll discover a complete, step-by-step free tutorial for creating your own crochet heart coaster, even if you’re a beginner.
Craft lovers all over the world are always looking for quick, fun, and meaningful projects to work on. The Crochet Heart Coaster Free Pattern – Free Tutorial offers the ideal balance between creativity and practicality. These adorable coasters are easy to customize with colors and yarn types, and they add a warm, handmade touch to any space.
Whether you’re crocheting for fun, creating gifts, or stocking up your craft store, this free pattern provides everything you need to succeed. Let’s dive into the steps and instructions to create your very own crochet heart coasters. Follow along to learn how to make this charming craft from start to finish.

1. Materials and Tools You’ll Need for the Crochet Heart Coaster
Before starting the Crochet Heart Coaster Free Pattern – Free Tutorial, gather all your supplies so the process flows smoothly.
You will need medium weight (worsted) cotton yarn. Cotton yarn is ideal because it absorbs moisture well, making it perfect for coasters.
Choose a crochet hook size H/8 (5.0 mm) for best results. You can adjust the size depending on your tension and yarn thickness.
You’ll also need a yarn needle for weaving in ends. This tool ensures your work looks neat and professional.
Scissors are necessary for trimming the yarn. Always keep a sharp pair on hand for clean cuts.
A stitch marker can be helpful, especially if you’re new to crocheting in the round. It helps you track your progress with each round.
Lastly, a flat surface or blocking mat will help you shape the coaster properly after it’s done. Lightly blocking your piece makes a huge difference.
2. Step-by-Step Crochet Instructions for the Heart Coaster
The heart shape might look complex at first glance, but with this free tutorial, you’ll see how simple it really is.
Start with a magic ring and chain four. This forms the base of your heart and allows for a tight center.
Next, double crochet multiple stitches into the ring to form the left and right lobes of the heart. Each stitch placement is key for the symmetry.
Use half double crochets and single crochets to shape the curves and create definition in your heart pattern.
As you reach the point at the bottom, use decreases to taper the shape neatly. This gives it a clean and professional look.
Continue around to finish the outer edge. Be sure to slip stitch into the beginning chain to close the round.
Fasten off, weave in all loose ends using a yarn needle, and block your coaster if desired. Your crochet heart coaster is now complete!
3. Creative Ways to Customize Your Heart Coaster
Personalizing your Crochet Heart Coaster Free Pattern – Free Tutorial adds uniqueness to your project and makes it more fun.
Use different yarn colors to suit the season or occasion—think red and pink for Valentine’s Day, pastels for spring, or even rainbow for pride events.
Try using variegated yarn for a multicolor effect. It brings extra flair and makes each coaster one-of-a-kind without changing yarns.
Add a border using a contrasting color. A simple round of single crochet in a bright hue can really make the heart shape pop.
Stitch on initials or small motifs using embroidery floss. This technique turns a basic coaster into a personalized gift.
Turn your heart coaster into hanging décor by adding a loop at the top. It can become a festive wall ornament or a nursery accessory.
Make a full set in coordinated colors and tie them with ribbon for a perfect handmade gift bundle. It’s thoughtful, beautiful, and practical.

4. Tips for Beginners and Common Mistakes to Avoid
If you’re new to crochet, don’t worry. This Crochet Heart Coaster Free Pattern – Free Tutorial is beginner-friendly with just a few common stitches.
Take your time reading the pattern before starting. Understanding the flow helps you avoid confusion mid-project.
Use a stitch marker to track the beginning of each round. It’s easy to lose track, especially when shaping the heart curves.
Maintain consistent tension. Too tight and the heart will curl, too loose and it’ll lose shape. Practice helps improve this skill over time.
Don’t skip the magic ring. It might feel tricky at first, but it’s essential for a neat, tight center in your heart shape.
Block your finished piece using a damp cloth and flat surface. This helps set the shape and gives your coaster a polished finish.
If you make a mistake, don’t panic. Crochet is very forgiving. Simply unravel a few stitches and redo—no need to start over completely.
Crochet Heart Coaster Free Pattern – Free Tutorial
Q1: What is the best yarn for making crochet heart coasters?
A1: Cotton yarn is highly recommended for coasters due to its absorbent and durable nature. It also holds its shape well after washing.
Q2: How long does it take to crochet one heart coaster?
A2: Most crocheters can finish one coaster in 30 minutes to an hour, depending on their skill level and focus.
Q3: Can I sell the coasters I make using this free pattern?
A3: Yes! This is a free tutorial, and you are typically allowed to sell finished items. Just don’t distribute or sell the pattern itself.
Q4: I’m left-handed. Can I still follow this pattern?
A4: Absolutely. You can mirror the steps and stitches. Many left-handed crocheters successfully adapt standard patterns.
Q5: How can I clean my crochet coasters?
A5: Gently hand wash them in lukewarm water and lay them flat to dry. Avoid wringing them out to maintain shape.
Q6: Can I make larger or smaller versions of this heart?
A6: Yes! Adjust your hook size or yarn thickness to scale the coaster. You can also add more rows for a bigger design.
Creating a Crochet Heart Coaster Free Pattern – Free Tutorial is a wonderful way to bring handmade love into your home. This project is simple, satisfying, and perfect for all skill levels. With step-by-step instructions, helpful tips, and creative ideas, you now have everything you need to make a beautiful set of


