Creating a Crochet Butterfly Granny Square Pattern is a delightful way to enhance your crochet skills while producing a charming and versatile design. Whether you’re a seasoned crocheter or just starting out, this free tutorial will guide you step-by-step in making a butterfly granny square that can be used for blankets, scarves, and more. Let’s dive into this fun and creative project that combines classic techniques with a modern twist.
Granny squares have been a staple in the world of crochet for decades. Adding a butterfly motif elevates this timeless design, making it unique and visually appealing. This tutorial will not only help you craft the pattern but also provide tips for choosing the best materials and colors for your project. Follow along to bring this beautiful design to life.
Whether you’re looking to create a personal project or a heartfelt gift, a Crochet Butterfly Granny Square Pattern is a wonderful choice. With detailed instructions and pro tips, you’ll find this tutorial easy to follow and immensely rewarding. Prepare your crochet hook, yarn, and let’s get started!
1. Materials Needed for the Butterfly Granny Square
To begin this project, it’s essential to gather the right materials. The quality of your tools and yarn significantly impacts the final outcome of your Crochet Butterfly Granny Square Pattern.
- Yarn: Choose medium-weight yarn in at least three colors: one for the butterfly, one for the background, and an optional contrasting color for the border. Cotton yarn works well for defined stitches.
- Crochet Hook: A 4mm or 5mm hook is ideal for most medium-weight yarns. Check the yarn label for recommendations.
- Scissors: Sharp scissors ensure clean cuts when trimming excess yarn.
- Tapestry Needle: This is used for weaving in loose ends and adding final touches.
- Stitch Markers: Optional but helpful for keeping track of your rounds.
- Pattern Guide: Follow the steps provided in this tutorial or print them for easy reference.
Having the right materials not only simplifies the process but also ensures your finished product is sturdy and visually appealing. Double-check your supplies before starting to avoid interruptions during your project.
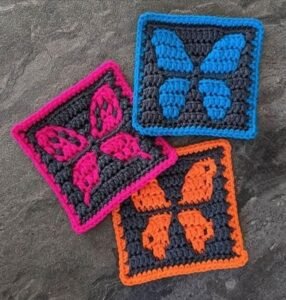
Choose colors that complement each other and suit your desired aesthetic. For a vibrant design, use bold and contrasting shades. If you prefer a subtle look, opt for pastel tones or monochromatic schemes.
Remember to test your yarn and hook combination by creating a small swatch. This step helps you gauge tension and ensures consistent results throughout the project. Now that you have your materials ready, let’s move to the next stage.
2. Step-by-Step Instructions for Crafting the Butterfly
The butterfly motif is the centerpiece of this pattern. Follow these detailed steps to crochet your butterfly with precision and ease.
- Start with a Magic Ring: Create a magic ring to serve as the foundation. Chain three to act as the first double crochet (DC).
- Create the Wings: Inside the magic ring, crochet three double crochets, chain two, and repeat this sequence three times to form the butterfly’s wings.
- Close the Ring: Pull the tail of the magic ring to tighten. Slip stitch into the top of the initial chain three to complete the round.
- Add Antennae: Use a contrasting color to create antennae. Attach the yarn to the center of the butterfly and chain five. Fasten off.
- Secure the Butterfly: Weave in loose ends to keep the design neat and tidy. Ensure all stitches are tight to prevent unraveling.
- Optional Embellishments: Add beads or embroidery to enhance the butterfly’s appearance. These small details can make your design stand out.
Repeat these steps if you plan to make multiple butterflies for your granny squares. Consistency is key, so take your time with each step.
Practice makes perfect. Don’t be discouraged if your first attempt isn’t flawless. The beauty of crochet lies in its flexibility—you can always unravel and try again.
3. Assembling the Granny Square
Once your butterfly is complete, it’s time to integrate it into the granny square. This process combines creativity and technique to form the final product.
- Foundation Chain: Start by chaining six and joining with a slip stitch to form a ring. This serves as the base for the granny square.
- First Round: Chain three and make two double crochets into the ring. Chain two, then repeat this sequence three more times to create four corners.
- Attach the Butterfly: Position the butterfly in the center of the square. Use a tapestry needle to secure it by stitching around the edges.
- Second Round: Work double crochets into the spaces between clusters from the first round. Chain two at each corner to maintain the square shape.
- Final Rounds: Continue adding rounds until the square reaches your desired size. Use alternating colors for a dynamic look.
- Finishing Touches: Fasten off the yarn and weave in any loose ends to complete the square.
Ensure that the butterfly remains centered and securely attached. This creates a polished appearance and prevents the motif from shifting over time.
Adjust the number of rounds based on your project needs. Larger squares work well for blankets, while smaller ones are ideal for coasters or embellishments.
4. Creative Uses for Butterfly Granny Squares
Now that you’ve mastered the pattern, explore various ways to use your Crochet Butterfly Granny Squares. The possibilities are endless!
- Blankets: Combine multiple squares to create a stunning blanket. Arrange them in a grid pattern for a cohesive design.
- Pillows: Use a few squares to craft decorative pillow covers. Add a fabric backing for durability.
- Scarves: Line up squares end-to-end to make a unique scarf. Connect them with a simple crochet border.
- Wall Art: Frame your butterfly granny squares for an elegant wall display. This is a great way to showcase your work.
- Bags: Incorporate the squares into tote bags or purses. They add a personal touch and standout style.
- Gifts: Handmade items like these make heartfelt gifts for friends and family. Customize the colors to suit the recipient’s preferences.
Experiment with different layouts and applications. Your creativity is the only limit!
By exploring these ideas, you can maximize the value of your crochet work and enjoy the satisfaction of crafting something both beautiful and functional.
FAQ
1. What is the best yarn for a butterfly granny square? Medium-weight cotton yarn is ideal for clear stitch definition and durability. You can also use acrylic for a budget-friendly option.
2. How long does it take to make one square? It depends on your skill level. Beginners may take 1-2 hours, while experienced crocheters can finish in under an hour.
3. Can I use different hook sizes? Yes, but using a smaller hook will make tighter stitches, and a larger hook will create a looser, softer square.
4. How do I join multiple granny squares? Use slip stitches or a single crochet seam for a sturdy connection. You can also sew them together with a tapestry needle.
5. Can I wash items made with these squares? Yes, but follow the yarn’s care instructions. Typically, handwashing or gentle machine cycles work best.
6. Are butterfly granny squares beginner-friendly? Yes, this pattern is suitable for beginners with basic crochet knowledge. The tutorial simplifies each step for easy understanding.
This Crochet Butterfly Granny Square Pattern – Free Tutorial has equipped you with the skills to create a stunning and versatile design. From selecting materials to assembling your square, every step is carefully explained to ensure success. We hope you enjoy the process as much as the final product
If you found this tutorial helpful, please share your feedback and suggestions. Your input helps us improve and provide more valuable content for the crochet community. Happy crocheting!


