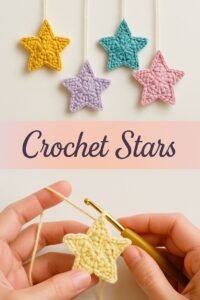
Crochet a Star for Beginners is one of the most exciting projects for anyone starting in the world of crochet. Small, decorative, and easy to learn, the star pattern is often recommended to practice new stitches and build confidence with yarn and hooks. For beginners, this project provides an opportunity to understand the rhythm of crochet while creating something beautiful and practical. Whether you want to use it as an ornament, an appliqué, or a gift, crocheting a star can be an excellent start to your handmade journey.
Crocheting a star allows you to explore different textures, yarn weights, and hook sizes, all while producing a design that feels rewarding and satisfying. Many people learning crochet often feel intimidated by large projects like blankets or garments, but a star pattern is small and manageable. Because of this, Crochet a Star for Beginners works as both a learning tool and a creative outlet. By the end of your first attempt, you’ll not only have a handmade star but also new skills you can carry into other patterns.
When beginners crochet a star, they often discover how versatile crochet can be. Stars can be made in one color or multiple shades, with fine yarn or chunky threads, and they always come out charming. This project is perfect to practice increases, shaping, and counting stitches without feeling overwhelmed. With patience and practice, your stars can become part of larger projects like garlands, baby mobiles, or even seasonal decorations. Starting with a star means you learn while creating something useful and fun.
Understanding the Basics of Crochet
To begin any project, especially Crochet a Star for Beginners, it is essential to understand the basics of crochet. The foundation of crochet lies in simple stitches like the chain, slip stitch, single crochet, and double crochet. These basic stitches form the building blocks of most patterns and are necessary before moving into shaping techniques that form the star. Beginners who practice these stitches first will find the star pattern more approachable and less frustrating.
Learning to hold the yarn and the hook comfortably is another key step. Beginners often struggle with tension, which is how tightly or loosely the yarn is pulled. Too tight and the stitches are hard to insert the hook into, too loose and the star may look floppy. To Crochet a Star for Beginners, practice making small chains and circles to get used to adjusting the yarn tension before starting the actual star pattern.
Crochet stars are usually worked in the round. Unlike rows, which go back and forth, round crochet creates a circular or spiral shape. This technique is what gives the star its form, beginning from a center point and expanding outward into the star’s points. Understanding how to crochet in the round is fundamental for this project, and mastering it will help in countless other designs.
Materials are equally important when preparing to crochet a star. Beginners should choose a medium-weight yarn in a light color, as dark shades make it harder to see stitches. Pair this with a hook recommended for the yarn size, usually listed on the yarn label. With these simple tools, you will be ready to start your first star project.
Reading crochet patterns can seem intimidating, but the star design usually comes with simple instructions. Abbreviations like “sc” for single crochet or “sl st” for slip stitch appear frequently. By practicing with a star pattern, you’ll naturally become familiar with reading crochet language. This knowledge is essential for moving on to more complex projects.
Finally, before starting the star itself, it’s good to remember that crochet is a skill learned through repetition. Your first star may not be perfect, and that’s perfectly fine. Each attempt builds your confidence and improves your technique. Soon, Crochet a Star for Beginners will feel natural and enjoyable, and you’ll be ready to experiment with variations.
Step-by-Step Guide to Crocheting a Star
To Crochet a Star for Beginners, the process usually starts with a magic ring or a small chain joined into a loop. This creates the center of the star, from which the rest of the design will grow. Many beginners find the magic ring tricky at first, but it’s worth learning because it allows the center to close tightly without a hole.
After forming the center, the next step is to build the base round. This round typically consists of simple stitches worked evenly into the ring, forming a small circle. This base is crucial because it provides the structure where the star’s points will be added. Beginners should focus on keeping their stitch count accurate, as miscounting may affect the symmetry of the star.
Once the circle is ready, the star points are created using a combination of stitches, often involving increases and taller stitches like half double crochet or double crochet. These stitches create the pointed shape. Following the pattern carefully ensures the points are even and sharp, making the star look neat.
When crocheting the points, beginners should take their time to understand the sequence of stitches. Patterns often repeat instructions for each point, so once you master the first one, the rest will follow smoothly. Repetition makes the process easier and helps build confidence with stitch variations.
Finishing the star involves slip stitches or fastening off the yarn. At this stage, it’s important to weave in the ends with a yarn needle to keep the star looking clean and secure. Leaving loose ends can make the project unravel or look unfinished, so taking this step seriously is part of good crochet practice.
The final result is a handmade crochet star, simple yet beautiful. This first star may serve as decoration, but it is also proof of your progress as a beginner. With every attempt, your stars will become more refined, and soon you’ll have a collection of creations to showcase your growing skill.
Creative Uses for Crochet Stars
One of the joys of Crochet a Star for Beginners is discovering how versatile the finished stars can be. Even as a beginner, you can turn your small creations into meaningful items that brighten your home or serve as thoughtful gifts. Stars don’t just remain as practice pieces; they can become part of a bigger creative journey.
Crochet stars make wonderful holiday decorations. Stringing them together as garlands, hanging them on a Christmas tree, or attaching them to wrapped gifts adds a personal handmade touch to celebrations. Their light, playful design fits perfectly into festive themes.
These stars are also ideal for baby items. Adding them to a baby blanket, a mobile, or even clothing makes the project unique and adorable. Handmade stars bring charm and warmth to baby accessories, making them cherished keepsakes.
Another creative use is in fashion accessories. Crochet stars can be sewn onto bags, hats, or scarves to add personality and color. They can even be turned into earrings or pendants when made with fine thread, giving your crochet projects a modern twist.
For home décor, stars can be joined together to create coasters, table runners, or wall hangings. With a little imagination, they move beyond small decorations to become larger design pieces that stand out in any room.
Lastly, crochet stars make excellent beginner-friendly gifts. A set of stars tied with a ribbon makes a thoughtful present for friends or family. Because they are handmade, each star carries a personal touch, turning simple yarn into something meaningful.
Tips to Improve Your Crochet Star
Even though Crochet a Star for Beginners is a simple project, a few tips can help you achieve better results and enjoy the process more. Following these practices will make your crochet experience smoother and more rewarding.
First, always count your stitches carefully. Losing track is common for beginners, but accurate counting ensures your star remains balanced and symmetrical. Using stitch markers can help keep your place when working in the round.
Second, practice consistency with your tension. Uneven tension can make one star point larger than another. If you find your stitches too tight, loosen your grip on the yarn. If they’re too loose, hold the yarn a little firmer. Over time, your hands will naturally find the right rhythm.
Third, don’t rush the process. Crochet is meant to be relaxing, and speed will come with practice. Taking your time allows you to notice mistakes early and correct them before they affect the whole project.
Fourth, experiment with different yarns and colors. Using variegated yarn can create beautiful effects without extra effort. Trying new materials makes the project exciting and helps you see how texture and thickness change the final look.
Fifth, always finish your project neatly. Weaving in ends carefully and blocking your star if necessary will give it a polished appearance. These finishing touches make a beginner’s work look professional.
Finally, stay patient with yourself. The first star may not look perfect, but each new attempt will be better. Every stitch you make is progress, and soon your stars will look consistent and beautiful.
FAQ About Crochet a Star for Beginners
1. Is crocheting a star difficult for beginners?
Not at all. Crochet a Star for Beginners is designed to be simple and approachable, making it one of the best starter projects for new crocheters.
2. What materials do I need to crochet a star?
You need yarn, a crochet hook that matches the yarn size, a yarn needle for weaving ends, and scissors. Light-colored yarn is recommended for beginners.
3. How long does it take to crochet a star?
Most beginners can finish their first star within 30 minutes to 1 hour, depending on practice and comfort with stitches.
4. Can I make a star without knowing advanced stitches?
Yes, most star patterns use basic stitches like single crochet, double crochet, and slip stitches, which are perfect for beginners.
5. What can I do with crochet stars once I finish them?
They can be used as ornaments, appliqués, keychains, gift decorations, or combined into larger projects like garlands and mobiles.
6. How can I make my crochet star look more professional?
Keep your tension consistent, count stitches carefully, and finish by weaving in ends neatly. Blocking the star can also improve its shape.
VIDEO TUTORIAL
Learning how to Crochet a Star for Beginners is more than just making a small decorative piece. It’s a stepping stone into the world of crochet, teaching you essential skills like working in the round, counting stitches, and shaping designs. Stars are versatile, creative, and enjoyable to make, and they allow you to practice while producing something meaningful.
If you’ve followed this guide, you now know the basics, step-by-step instructions, creative uses, and tips to improve your crochet stars. With practice, your stars will become more polished and open the door to more complex projects.
Now it’s your turn: try crocheting your own star and share your experience. Leave your sincere opinion and suggestions so this guide can continue helping more beginners discover the joy of crochet.