The amigurumi cherry keychain is a delightful and beginner-friendly crochet creation that’s as charming as it is practical. Whether you’re looking to brighten up your keyring, craft a handmade gift, or explore the adorable world of amigurumi, this small but eye-catching project is the perfect way to start. With its vibrant colors and cute aesthetic, the amigurumi cherry keychain appeals to crafters of all ages and skill levels.
What makes this mini project so loved is its simplicity and quick turnaround. You don’t need to be a crochet expert to make it. In fact, all you need is a bit of yarn, a crochet hook, and a desire to create something joyful. It’s a great way to use leftover yarn and practice essential stitches without committing to a long-term project.
As you explore this tutorial, you’ll learn how to make an amigurumi cherry keychain step by step, using basic materials and easy-to-follow techniques. We’ll also explain the best yarn choices, how to stuff and finish your piece, and how to assemble the final product securely. Let’s dive into this sweet and satisfying project!
1. Understanding the Basics of Amigurumi for Your Cherry Keychain
Before you pick up your crochet hook, it’s helpful to understand what amigurumi actually means. This Japanese art form combines the words ami (crocheted or knitted) and nuigurumi (stuffed doll). The amigurumi cherry keychain is a small-scale version of this tradition, often used as accessories, gifts, or fun collectibles.
To begin crafting your amigurumi cherry keychain, familiarize yourself with the tools you’ll need. Most projects require a 2.5mm–3.5mm crochet hook, cotton or acrylic yarn in cherry red and green for the stem and leaf, and polyester stuffing. You’ll also need a yarn needle for sewing parts together.
One of the most common stitches in amigurumi is the single crochet (sc), which creates a tight fabric to keep stuffing inside. Increasing and decreasing stitches help shape the cherries into their cute round form. Stitch markers are also useful for tracking your rounds as you work.
Make sure your tension is consistent throughout the process. Tight stitches are key in amigurumi cherry keychain crafting because they prevent the stuffing from showing through. If your work feels too loose, go down a hook size until it feels firm.
Once you have your tools ready, choose your yarn wisely. Cotton yarn is often preferred for keychains because it holds its shape better and doesn’t fuzz with use. However, soft acrylic yarns can also work, especially if you want a plush finish.
Now that you understand the essentials, it’s time to move on to making the cherries themselves. This step is where the fun begins, and you’ll see your project start to take shape with every stitch you make.
2. Step-by-Step Instructions to Crochet the Cherry Pieces
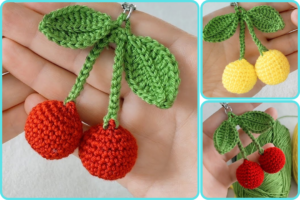
The amigurumi cherry keychain usually consists of two cherries, a green stem, and a small leaf. Let’s begin by crocheting the cherries, which are made using the magic ring technique and worked in continuous spirals.
Start with a red yarn and make a magic ring. Into that ring, crochet six single crochets. This is your first round. In round two, increase in each stitch (12 stitches). Continue increasing evenly in subsequent rounds to widen the cherry until it reaches the desired diameter, typically five rounds in total.
Once you’ve reached the widest point of the cherry, start decreasing. This is done by crocheting two stitches together. Continue decreasing until your cherry is nearly closed, leaving a small opening at the top to insert stuffing.
Add a small amount of fiberfill stuffing through the hole. Be careful not to overstuff, or your cherry might stretch and distort. Once it’s filled, finish decreasing until the cherry is completely closed and secure the final stitch.
Repeat this process to create a second cherry. Make sure both are about the same size for a balanced and professional-looking amigurumi cherry keychain.
Now that your cherries are done, it’s time to move on to the green parts. Begin with the stem, which can be crocheted as a simple chain with single crochet rows to give it thickness. The length is up to you, but a short, sturdy stem works best for keychains.
Finally, crochet a small leaf. This can be done by creating a chain of six, then working single crochets and slip stitches to shape the leaf into a classic teardrop form. The leaf adds a charming touch and a pop of contrast to your amigurumi cherry keychain.
3. Assembling and Finishing the Amigurumi Cherry Keychain
With all your pieces completed, it’s time to assemble your amigurumi cherry keychain. This part is just as important as the crochet work itself, as the way you join everything together affects the final look and durability.
Start by sewing the two cherries together near the top. Use your yarn needle and a piece of matching red yarn, stitching securely while keeping the cherries evenly aligned.
Next, attach the stem to the top of the cherries. Fold it in half if you want the cherries to dangle side by side, or keep it straight for a longer hanging look. Stitch the stem securely onto the cherries using green yarn or thread.
Sew the leaf onto one side of the stem or near the top of one cherry. This adds a natural, botanical look that enhances the realism of your amigurumi cherry keychain while maintaining its cuteness.
Now, add your keyring or keychain hardware. Use a metal ring or lobster clasp, securing it to the stem or the midpoint between the cherries. Make sure it’s attached tightly to avoid it coming loose during use.
Once everything is in place, double-check all stitches and seams. Reinforce any loose areas to ensure the piece is sturdy and durable. The goal is to have a amigurumi cherry keychain that’s not just cute but also practical and long-lasting.
Finally, trim any excess yarn and gently shape your cherries and leaf. You can slightly press them into shape with your fingers, giving them a fuller and more polished finish. Your project is now ready to be used or gifted with pride!
4. Creative Uses and Customization Ideas for Your Cherry Keychain
One of the best things about crafting a amigurumi cherry keychain is how customizable it is. Once you master the basic technique, you can experiment with different colors, shapes, and accessories to make each piece unique.
Try using variegated yarns to create gradient cherries or pastel colors for a whimsical twist. You could even make rainbow cherries for a fun, pride-inspired version of the amigurumi cherry keychain.
Add personality to your cherries with safety eyes and embroidered smiles. This is perfect for making kawaii-style keychains, especially for kids or those who love cute aesthetics.
You can also attach your keychain to more than just keys. Hook it onto a backpack zipper, purse strap, or even a gift bag. It’s a thoughtful handmade detail that makes any object feel more special.
Turn your keychain into a seasonal decoration. For example, use glittery yarn for a holiday version, or pastel shades for Easter. The amigurumi cherry keychain can be adapted for every occasion and theme.
If you’re feeling adventurous, you can even create a matching fruit series. Pair your cherry keychain with strawberries, lemons, or watermelons. This makes a wonderful gift set or product collection if you sell your crafts.
Whatever you choose, don’t be afraid to make it your own. Crochet is a personal and expressive art form, and the amigurumi cherry keychain is a perfect canvas for your creativity.
Frequently Asked Questions
What size should my amigurumi cherry keychain be?
Most amigurumi cherry keychains measure around 4–6 cm in diameter for each cherry. The overall size depends on your yarn, hook, and stuffing amount.
Can I use different types of yarn?
Yes! Cotton yarn is best for structure, but you can also use acrylic or blends. Just adjust your hook size to maintain tight stitches.
How do I attach the keyring securely?
Use a sturdy jump ring or lobster clasp and sew it firmly into the stem or top area. Double knot your thread and weave in ends to prevent slipping.
Is this a beginner-friendly project?
Absolutely. The amigurumi cherry keychain uses simple stitches and techniques, making it a great starting project for beginners.
Can I wash my cherry keychain?
Spot cleaning is recommended. If you use cotton yarn and secure all stitches, gentle handwashing is possible, but avoid soaking metal parts.
How long does it take to make one?
Typically, it takes between 1–2 hours to complete one amigurumi cherry keychain, depending on your crochet speed and experience.
The amigurumi cherry keychain is more than just a cute accessory—it’s a joyful project that introduces or reinforces essential crochet techniques in a fun, compact way. From the magic ring to the final stitch, each step invites you to play with color, texture, and creativity while crafting something you’ll actually use.
Whether you’re crocheting for yourself, gifting to a friend, or adding it to your handmade shop, this keychain project is guaranteed to bring smiles. We hope this tutorial has inspired you to try making your own amigurumi cherry keychain and explore all the possibilities this little fruit has to offer.
Have you tried this pattern or have ideas to customize it? We’d love to hear your thoughts! Please leave a sincere comment below with your experience, suggestions, or questions. Your feedback helps our crochet community grow and thrive


