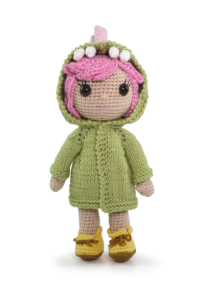
The Girl Anny – Free Tutorial is a complete guide to creating a charming and adorable handcrafted doll. Whether you are new to crafting or a seasoned artisan, this free tutorial will walk you through every step to bring your Girl Anny to life. With simple techniques and easy-to-follow instructions, you will be amazed at how quickly you can create your own beautiful doll.
Creating the Girl Anny is not just about crafting a doll, but also about pouring your creativity and passion into every detail. This tutorial will guide you on how to choose the best materials, master the essential techniques, and add unique touches that make your Girl Anny truly one of a kind. Plus, you will discover variations and customization tips to make the doll even more special.
Crafting a Girl Anny doll can be a delightful project to share with family and friends. Whether you make it as a gift or a keepsake, this project brings joy and satisfaction. Let’s get started with this free tutorial and explore the wonderful world of handmade dolls!
1. Essential Materials for Girl Anny
Before beginning your Girl Anny project, it’s crucial to gather all necessary materials. This preparation will help streamline the crafting process and ensure your final product is beautiful and durable.
- Yarn: Soft and smooth cotton yarn is ideal for creating a cuddly texture.
- Crochet Hook: A 3.5mm or 4.0mm hook works best for achieving tight and neat stitches.
- Stuffing Material: Use hypoallergenic fiberfill to ensure the doll remains soft and fluffy.
- Safety Eyes: Choose a size that suits the doll’s proportions to give it a lifelike appearance.
- Embroidery Thread: Use to add facial features and other decorative elements.
- Scissors and Needle: Essential for cutting and stitching details.
Having the right materials will not only make your crafting process easier but also enhance the final look of your Girl Anny doll. Always opt for high-quality supplies to achieve the best results.
2. Step-by-Step Guide to Crafting Girl Anny
Follow these step-by-step instructions to craft your Girl Anny doll with precision and care. Take your time with each step to ensure a flawless result.
- Step 1: Head and Face – Start with a magic ring and work in continuous rounds, increasing and decreasing to form a round shape. Attach safety eyes and embroider the mouth and nose.
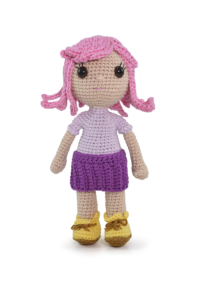
- Step 2: Body and Dress – Join yarn at the base of the head and crochet downwards to create the body. Add color changes to design a dress or outfit directly into the body.
- Step 3: Arms and Legs – Crochet two identical arms and legs separately, then attach them to the body securely.
- Step 4: Hair and Accessories – Use yarn to create hair by looping and securing strands on the scalp. Style as desired.
- Step 5: Final Assembly – Sew all parts together, ensuring they are securely fastened.
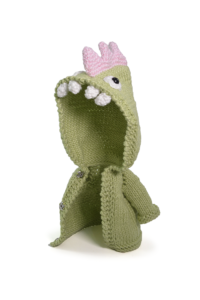
- Step 6: Finishing Touches – Add decorative elements like bows, hats, or tiny shoes to personalize your doll.
Patience and attention to detail are key to achieving a beautiful Girl Anny doll. Don’t rush the assembly process, and take breaks to maintain focus and precision.
3. Customization Ideas for Your Girl Anny
One of the best aspects of creating a Girl Anny doll is the opportunity to personalize it according to your preferences. Here are some creative ideas to make your doll unique.
- Color Schemes: Experiment with different color combinations to match various themes or seasons.
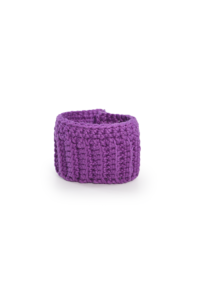
- Clothing Styles: Craft multiple outfits to give your doll a versatile wardrobe.
- Accessories: Add hats, scarves, or small bags to enhance the doll’s look.
- Facial Expressions: Change the position of the eyes or shape of the mouth to give the doll a specific emotion.
- Hair Styles: From long braids to short curls, experiment with yarn styles to find the perfect look.
- Theme Variations: Create holiday-themed dolls with festive colors and decorations.
Let your imagination guide you as you transform your Girl Anny into a one-of-a-kind creation. The possibilities are endless!
4. Tips for Perfecting Your Girl Anny Doll
Crafting a Girl Anny doll requires skill and patience. Here are some tips to help you master the process and achieve flawless results.
- Consistent Tension: Keep your stitches uniform by maintaining consistent yarn tension.
- Secure Stitching: Reinforce joints and connections to prevent parts from loosening.
- Neat Embroidery: Use fine needles and tight stitches for facial features to avoid loose threads.
- Block and Shape: Lightly steam or block the finished doll to smooth out any uneven areas.
- Double-Check Measurements: Ensure each part matches the intended size before assembling.
- Store Safely: Protect the finished doll from dust and moisture to preserve its quality.
By following these tips, you can craft a Girl Anny doll that looks professionally made and will last for years to come.
Frequently Asked Questions about Girl Anny – Free Tutorial
Q1: How long does it take to make the Girl Anny doll? A: Depending on experience, it usually takes 6 to 12 hours to complete the project.
Q2: Can I use different yarn types? A: Yes, but choose a yarn with similar thickness to maintain size consistency.
Q3: What is the best way to clean the doll? A: Hand wash gently in cold water and air dry to preserve the shape.
Q4: Can I sell the dolls made from this tutorial? A: Always check the pattern’s licensing terms, but typically, handmade items from free patterns can be sold.
Q5: How can I make the doll’s hair look more realistic? A: Use a mix of yarn types or brush out acrylic yarn for a softer, more natural appearance.
Q6: Is it possible to make smaller or larger versions? A: Adjust the yarn weight and hook size to scale the doll up or down as desired.
The Girl Anny – Free Tutorial is a fantastic way to create a charming and customizable doll that reflects your creativity. By following the steps outlined in this guide, you can craft a doll that is not only adorable but also durable and unique. Don’t hesitate to experiment with colors and accessories to make your Girl Anny truly special. Share your experience and thoughts in the comments below, and let us know how your project turned out! Happy crafting!


