The EASIEST LABUBU CROCHET pattern has taken the crafting world by storm, delighting beginners and experienced crocheters alike. If you’ve been looking for an enjoyable and relaxing way to create something utterly adorable, this is the perfect project for you. Combining charm and simplicity, the EASIEST LABUBU CROCHET tutorial helps bring this iconic character to life with just a few basic materials and a little patience.
What makes the EASIEST LABUBU CROCHET project so appealing is that it doesn’t require advanced skills to produce stunning results. Even if you’re just starting your crochet journey, you’ll be amazed at how quickly you can bring your very own Labubu to life. With a compact size and simple shape, this amigurumi-style project is ideal for gifting, collecting, or displaying.
In this article, we’ll explore every step of the process, using a warm and friendly tone to guide you through. We’ll discuss how to choose the right yarn and tools, follow the pattern, add facial details, and more—all while focusing on the keyword EASIEST LABUBU CROCHET to keep things optimized for search and user intent.
1. Getting Started with the EASIEST LABUBU CROCHET
To begin your EASIEST LABUBU CROCHET journey, you’ll need to gather some essential materials. Fortunately, this pattern is low-cost and doesn’t require anything fancy. You’ll just need a few key tools and yarns to start creating magic.
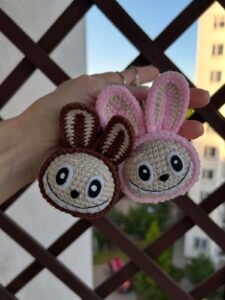
Choose a soft, medium-weight yarn for ease of handling. Many beginners find cotton yarn ideal because it holds shape well and is forgiving of small mistakes. The character Labubu typically uses beige, pink, and white yarn shades to mimic its iconic look.
A 2.5 mm or 3 mm crochet hook is usually the best choice for this project. It allows tight enough stitches to keep the stuffing secure but is still easy to work with.
You’ll also need stuffing material such as polyester fiberfill. This gives your EASIEST LABUBU CROCHET its squishy and loveable shape. Don’t forget safety eyes or black embroidery thread for detailing the eyes, mouth, and nose.
Keep stitch markers and a yarn needle on hand too. These small tools help you keep track of your rounds and assemble your Labubu more neatly and precisely.
Reading through the entire pattern before starting can give you a better sense of the process. This way, you’ll feel more confident as you crochet each piece of your EASIEST LABUBU CROCHET project.
2. Crocheting the Labubu Head and Body
The EASIEST LABUBU CROCHET starts with the head, which is worked in continuous spirals. This means you won’t be joining each round with a slip stitch, which creates a smoother finish.
Start with a magic ring and work six single crochets into it. Then, increase in each stitch around to expand the head. You’ll continue increasing gradually until the head reaches the desired size, usually around 20–24 stitches in circumference.
After shaping the head, you’ll begin to decrease stitches to close the top part slightly. This creates the gentle curve that defines Labubu’s unique look. Use a stitch marker to keep track of where each round begins.
Stuff the head firmly but not too tight. This gives structure while allowing some softness. Be sure to push the stuffing into every part of the head evenly.
Once the head is finished, the body is next. The body is usually smaller than the head and worked from bottom to top. Begin with a magic ring again, using the same yarn.
After finishing the body, sew it carefully to the head using a yarn needle and matching yarn. This helps your EASIEST LABUBU CROCHET stay stable and well-shaped.
3. Crafting the Arms, Legs, and Ears
Labubu’s arms and legs are small and cylindrical, making them perfect practice pieces for beginners. You’ll be using single crochet stitches in continuous rounds here as well.
For each arm, begin with a magic ring and work a small number of stitches—usually six to eight. You’ll crochet a few rounds straight without increases to create the arm’s length.
Stuff each arm lightly before closing. This helps maintain the soft, flexible appearance of the EASIEST LABUBU CROCHET limbs without making them too stiff.
Repeat the same process for the legs, making sure they are slightly longer or equal in size depending on your version of Labubu. As always, match your stitch count to the pattern.
The ears are one of Labubu’s cutest features. They are often long and slightly pointed. These can be made flat or slightly stuffed, depending on your preferred style.
After crocheting all the parts, it’s time to assemble your creation. Carefully sew the arms, legs, and ears onto the body, making sure everything is evenly placed.
Double-check alignment before sewing each part permanently. Use pins or stitch markers to hold pieces in place if necessary.
4. Finishing Touches and Adding Personality
The final stage of the EASIEST LABUBU CROCHET is adding those small details that give your character charm and personality. This is where your creativity can really shine.
Begin with the facial features. You can use safety eyes for a polished look or embroider the eyes using black thread. Position them carefully so Labubu looks friendly and expressive.
Use pink or red yarn to embroider a small mouth and nose. You can even add blush details to the cheeks with a little pink felt or yarn.
For extra character, consider adding eyebrows, teeth, or little accessories like a scarf, hat, or tiny outfit. These small customizations make each Labubu unique and personal.
Check the entire piece for any loose ends or visible stitching. Tidy up by weaving in yarn tails and snipping off any excess threads.
You can lightly brush the finished figure with a clean toothbrush to fluff up the yarn and give it a soft, finished look.
Once done, your EASIEST LABUBU CROCHET is ready to be hugged, displayed, or gifted. It’s not just a cute toy—it’s a handmade treasure!
FAQ – Frequently Asked Questions About EASIEST LABUBU CROCHET
What skill level is required to make the EASIEST LABUBU CROCHET?
This pattern is designed for beginners. If you know how to do basic stitches like single crochet and magic ring, you can make this easily.
How long does it take to complete one Labubu?
It usually takes 4 to 6 hours depending on your speed and experience. Beginners may take a bit longer, but it’s a great weekend project.
Can I use different yarn for the EASIEST LABUBU CROCHET?
Yes, but using soft cotton or acrylic yarns will give the best results. Make sure to adjust your hook size to match your yarn.
Is the pattern safe for children’s toys?
Yes, but if giving to a child under 3, use embroidered eyes instead of safety eyes to avoid any choking hazards.
Do I need a printed pattern, or can I follow a digital one?
You can use either. A digital pattern on a tablet or phone works just as well, and many people prefer it for zooming in on details.
Can I sell the Labubu I make?
Yes, you can sell finished items made from the EASIEST LABUBU CROCHET, but always credit the pattern source if required by the designer.
The EASIEST LABUBU CROCHET pattern offers an inviting and joyful experience for anyone eager to create a lovable character by hand. From gathering materials to stitching each part and assembling the final figure, the process is satisfying, creative, and highly rewarding. Whether you’re a beginner or just want a quick and adorable project, this pattern is sure to become one of your favorites.
We hope this step-by-step article has helped you feel confident and inspired to start your own EASIEST LABUBU CROCHET creation. If you’ve made one, we’d love to hear your thoughts! Please leave a sincere opinion and any suggestions for future patterns or tutorials you’d like to see. Your feedback helps us grow and serve you better.


