Adorable Crochet Snail Keychains are taking the handmade craft world by storm. These tiny, charming creations combine whimsical design with practicality, making them the perfect project for crocheters of all skill levels. Whether you’re creating one as a gift, for your own keyring, or even as a small item to sell at craft fairs, these miniature snails are both fun to make and heart-meltingly cute.
From the spiraled shell to the tiny antennae, Adorable Crochet Snail Keychains offer endless opportunities for customization. You can experiment with colors, yarn textures, facial expressions, and even little accessories like bows or mini hats. The best part? They’re quick to complete, using only a small amount of yarn and a bit of time—ideal for crafters with busy schedules.
In this tutorial and guide, we’ll explore how to make your own Adorable Crochet Snail Keychains, step-by-step. Along the way, we’ll look at materials, stitch tips, assembly tricks, and creative inspiration so you can start or expand your collection of delightful snail companions.
1. Materials and Tools You’ll Need
To start creating your own Adorable Crochet Snail Keychains, having the right tools and materials is essential. This helps ensure that your finished piece is both sturdy and visually appealing.
You’ll need a small quantity of yarn, and cotton yarn is often preferred for its neat finish and durability. Choose soft pastel colors or bright hues for the shell to give your snail character.
Crochet hooks in size 2.0 mm to 3.5 mm are ideal, depending on your tension and yarn type. A smaller hook will give your snail a tighter stitch, making it more compact and perfect for keychain use.
You’ll also need a yarn needle for sewing the pieces together, safety eyes or embroidery thread for the face, and some polyester fiberfill for light stuffing. The stuffing adds shape to the snail’s body and shell without making it bulky.
Don’t forget the keychain hardware! Split rings or lobster clasps are most commonly used. Make sure they’re secure and appropriately sized so they don’t overpower your design.
Scissors, stitch markers, and a measuring tape are also handy to keep close. Stitch markers help you track rounds easily, especially when working with continuous rounds (amigurumi style).
2. Crochet Techniques and Stitches Used
Adorable Crochet Snail Keychains typically use a few basic amigurumi stitches. These stitches are beginner-friendly and provide a tight, solid fabric, ideal for small stuffed designs.
The magic ring or magic circle is the most important starting point. It allows you to begin crocheting in the round without leaving a hole in the center—perfect for a snail’s spiral shell.
The single crochet (sc) is the primary stitch used throughout the pattern. It gives the snail a smooth, even texture and works well in continuous spirals.
Increases (inc) and decreases (dec) help shape your snail’s body and shell. An increase means making two stitches in one stitch, while a decrease involves crocheting two stitches together.
The slip stitch (sl st) is useful when joining rounds or adding decorative lines. It’s subtle and blends well into your work without adding bulk.
Fastening off and weaving in ends neatly ensures that your snail is not only adorable but also durable. A neat finish makes all the difference in presentation.
Optional stitches like half-double crochet (hdc) or double crochet (dc) can be used for added texture in the shell or to create tiny accessories for your snail friend.
3. Assembling Your Crochet Snail Keychain
Once all your parts are crocheted, it’s time to bring your Adorable Crochet Snail Keychain to life. Assembly is where your creativity can really shine.
Start by stuffing the snail’s body and shell lightly with fiberfill. Don’t overfill, as this can distort the shape and make sewing difficult.
Sew the shell onto the body using a whip stitch or ladder stitch. Position the shell slightly tilted for a natural, whimsical look. Make sure it’s centered from the side view.
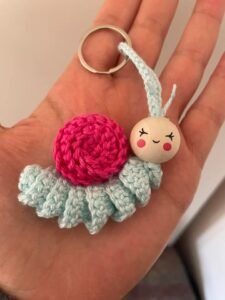
Attach the facial features next. If you’re using safety eyes, insert them before closing the body completely. Alternatively, you can embroider sleepy eyes or add eyelashes with a bit of black yarn or thread.
To add character, you can stitch on a smile, blush using a bit of pink pastel chalk, or even create a tiny bow or top hat using leftover yarn. These finishing touches make your snail unique.
Finally, attach the keychain hardware. Use a strong yarn loop or metal jump ring to secure the snail to the clasp. Ensure the connection is tight to avoid losing your adorable creation.
Double-check all your seams, and your keychain is ready to accompany you everywhere. Whether clipped to a backpack, purse, or keyring, it’s guaranteed to bring smiles.
4. Fun Variations and Creative Ideas
One of the best parts of crafting Adorable Crochet Snail Keychains is the freedom to personalize each one. There are so many ways to get creative!
Try using self-striping yarn for a shell that looks naturally colorful without switching yarns. This adds a unique twist and saves time on color changes.
For themed snails, use holiday colors or accessories. A red-and-green snail with a tiny Santa hat is perfect for Christmas, while pastel snails with mini eggs make lovely Easter gifts.
Create a collection of rainbow snails, each representing a different mood. You could embroider happy faces, sleepy eyes, or cheeky expressions to give each one personality.
Experiment with yarn types. Velvet or chenille yarn makes the snails incredibly soft and plush, while cotton yarn gives a crisp, clean look.
You can even make a mini snail family by adjusting the size of your hook and yarn. A trio of snails in small, medium, and large makes a delightful set.
Finally, add a tag or small note if you’re gifting or selling your snails. It’s a nice personal touch and can include care instructions or a thank-you message.
Adorable Crochet Snail Keychains
Q: Are Adorable Crochet Snail Keychains beginner-friendly?
A: Yes! They typically use simple stitches like single crochet and basic increases/decreases. With a little practice, even a beginner can complete one in just a few hours.
Q: What yarn is best for these snail keychains?
A: Cotton yarn is most recommended due to its smooth texture and durability. However, acrylic yarn also works well and offers a broader color range.
Q: How do I attach the keychain securely?
A: Use a metal jump ring or crochet a tight loop on top of the snail’s head and connect it to a split ring or lobster clasp. Always double-knot the yarn and test the strength before use.
Q: Can I sell Adorable Crochet Snail Keychains?
A: Absolutely! These are great items for small handmade businesses. Just ensure that if you’re using someone else’s pattern, you have permission to sell finished items based on it.
Q: How long does it take to make one keychain?
A: On average, one snail takes about 1–2 hours to complete, depending on your crochet speed and level of detail.
Q: What are some gift ideas using these snail keychains?
A: They’re perfect as party favors, stocking stuffers, friendship tokens, or even bag charms for kids. They’re small but memorable gifts that can suit any occasion.
Creating your own Adorable Crochet Snail Keychains is not only a fun and fulfilling project but also a great way to explore your creativity. We covered everything from essential materials to step-by-step construction and even shared ideas for customization and gifting. These little snails are practical, charming, and easy to love.
Now it’s your turn—try making one (or a dozen!) and see how much joy they bring. If this tutorial helped you, please leave your honest opinion and feel free to share your creations or suggest future ideas. We’d love to hear what you think and what you’ve made!


